Summer hits different when you’re standing in front of the open fridge at 6 pm, wondering why you even bought groceries.
Nothing’s coming together.
Sound familiar?
That’s what this list is for.
55 summer dinners that actually make sense when it’s too hot to stand over a stove, the kids are everywhere, and you want something good without making a whole production out of it.
Easy stuff, mostly.
The kind that doesn’t need a culinary degree.
Some of these you don’t even turn the oven on for.
The grilled chicken ones are those that get the whole family showing up on time, which never really happens otherwise.
There’s high protein options if you’re eating with a little intention this season.
Mediterranean stuff too, all those bright flavors that just work when it’s hot out.
Meal prep ideas for the people who like having food ready to go.
And honestly, a few genuinely lazy dinners. No judgment. That’s half the list.
Cooking for a crowd, keeping it light on a brutal day, or just sick of the same three things on repeat. Something here works.
Let’s get into it.
For No-Oven Summer Nights
Some nights it’s too hot to even look at the oven, so these don’t need one. Just cold, fresh food ready about the second you want them.
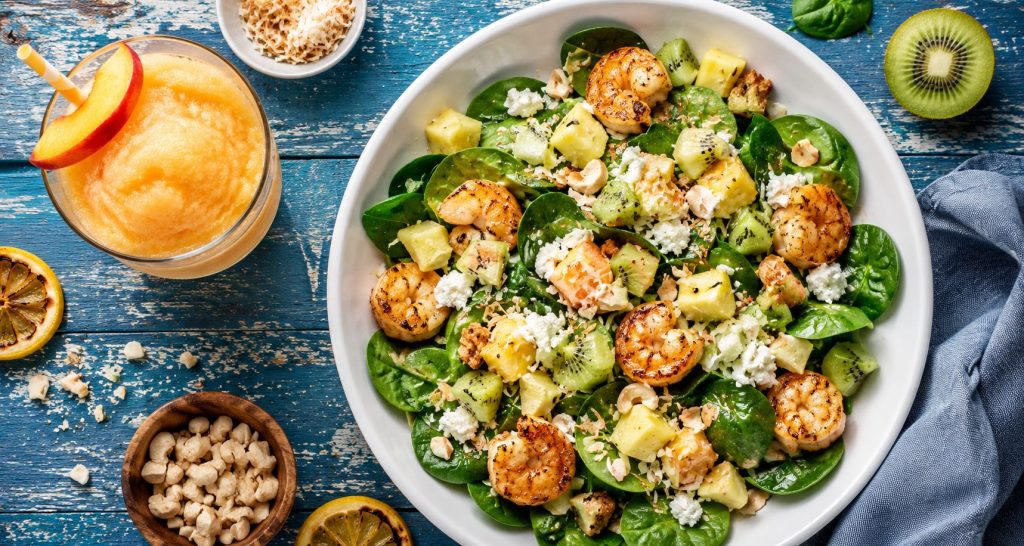
Tropical Shrimp Salad with Peach Slushy
This tropical shrimp salad has fruit, toasted coconut, chipotle shrimp, goat cheese, lemon vinaigrette, and a sparkling peach slushy.
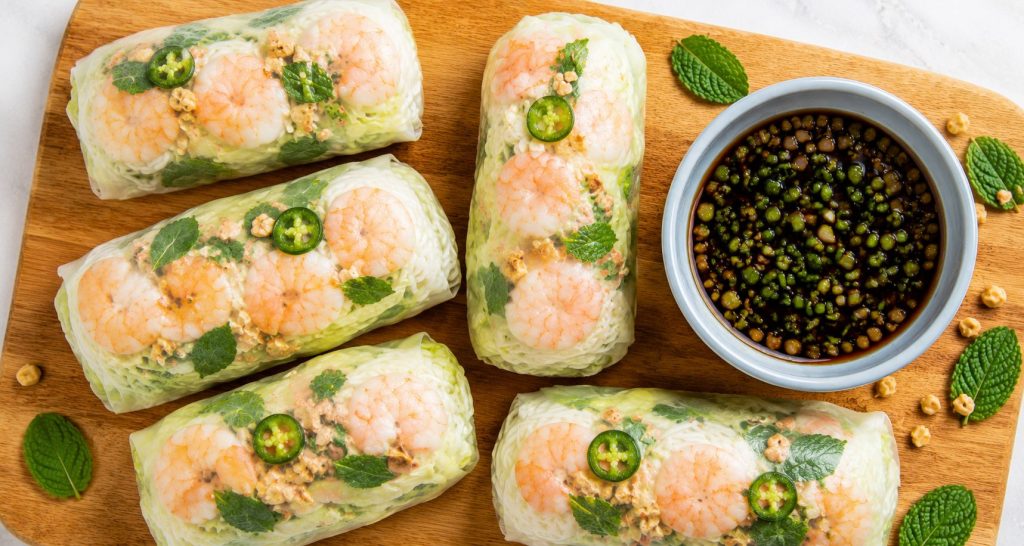
Shrimp Summer Rolls with Sesame-Soy Sauce
These shrimp summer rolls are wrapped with shrimp, cabbage, mint, peanuts, jalapeno, rice noodles, and served with sesame-soy dipping sauce.
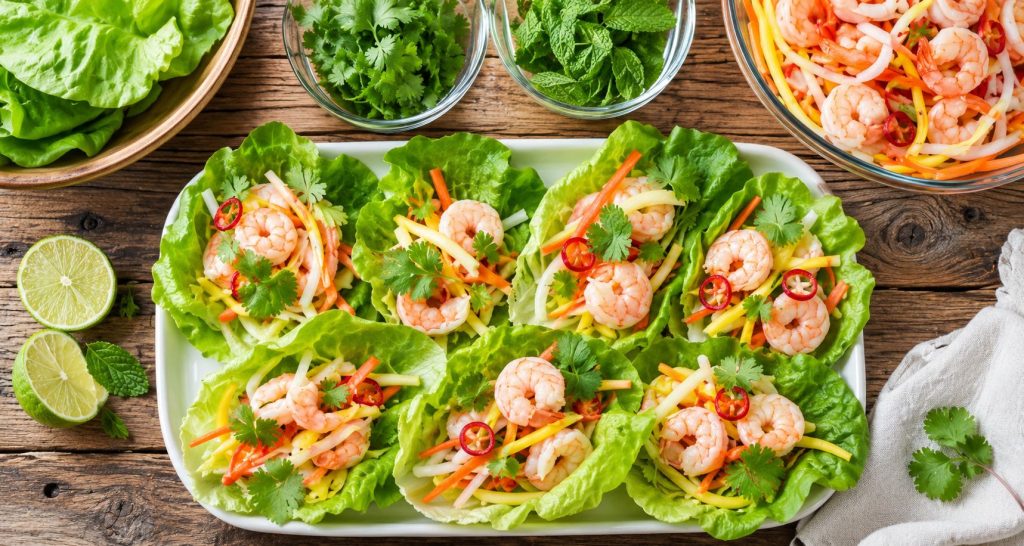
Vietnamese Shrimp Mango Lettuce Wraps
These Vietnamese shrimp mango lettuce wraps are made with shrimp, mango, carrot, daikon, chile, herbs, and a lime fish sauce dressing.
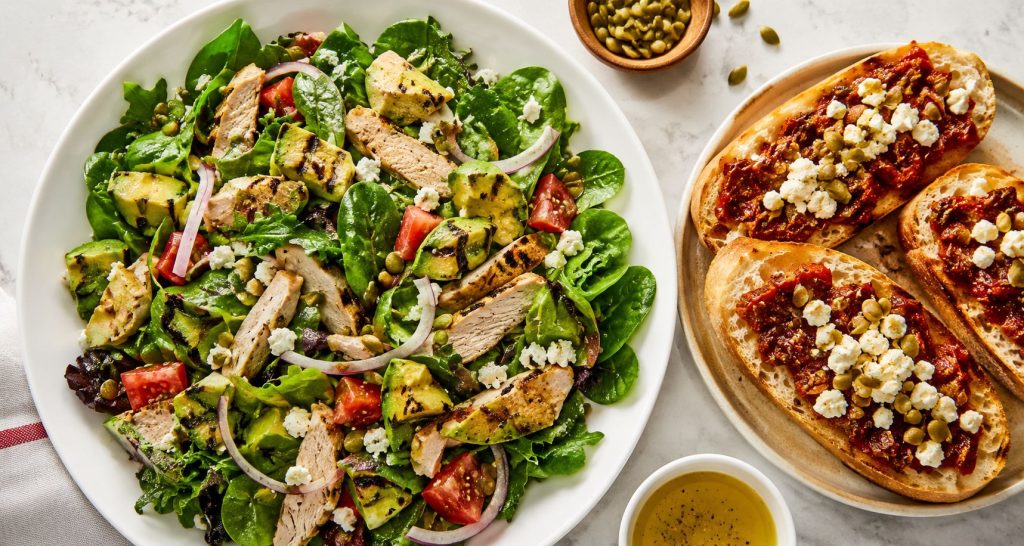
Avocado Salad With Feta Tomato Bread
This avocado salad with feta tomato bread has grilled turkey, grilled avocado, tomato, red onion, mixed greens, feta, pepitas, lemon vinaigrette, and warm tomato bread.
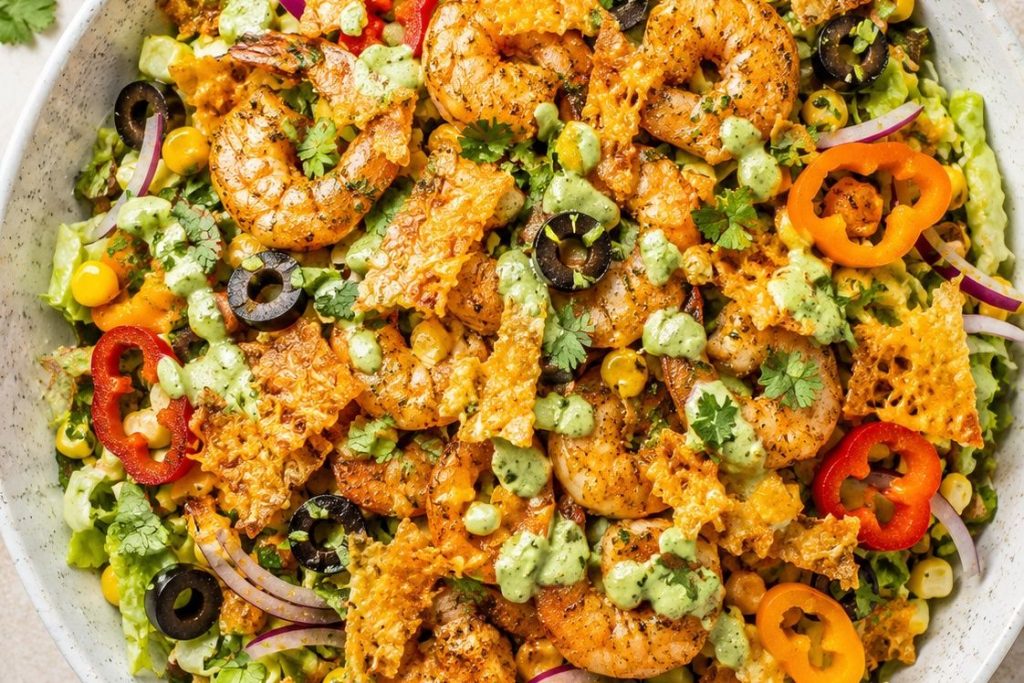
Shrimp Tostada Salad with Cheesy Crunch
This shrimp tostada salad has taco seasoned shrimp, peppers, corn, olives, dressed lettuce, and a baked cheesy tortilla crumble.
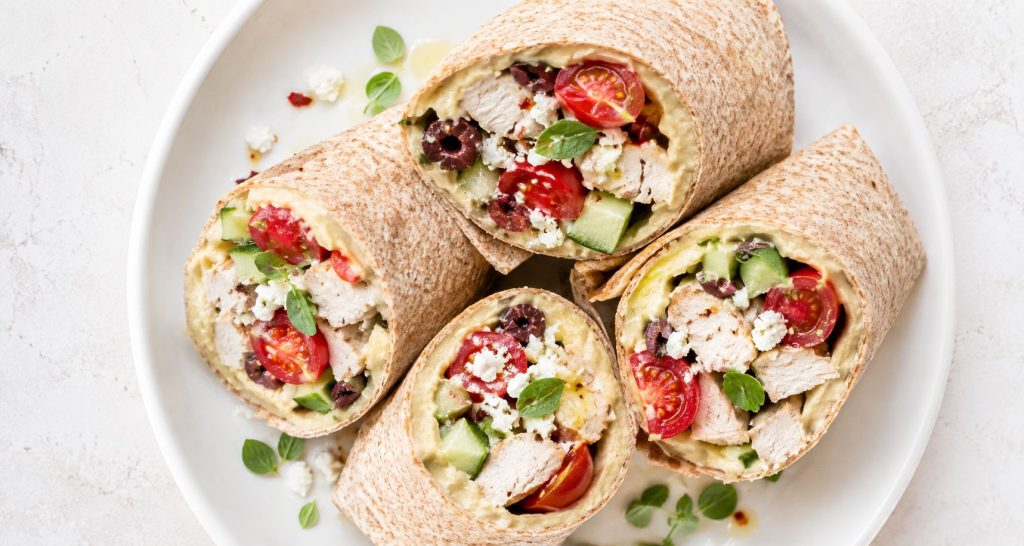
Greek Chicken Wraps With Hummus
These Greek chicken wraps do that sweet little thing where hummus, rotisserie chicken, tomatoes, olives, feta, cucumber, lemon, oregano, and a whole wheat tortilla turn into dinner in minutes.
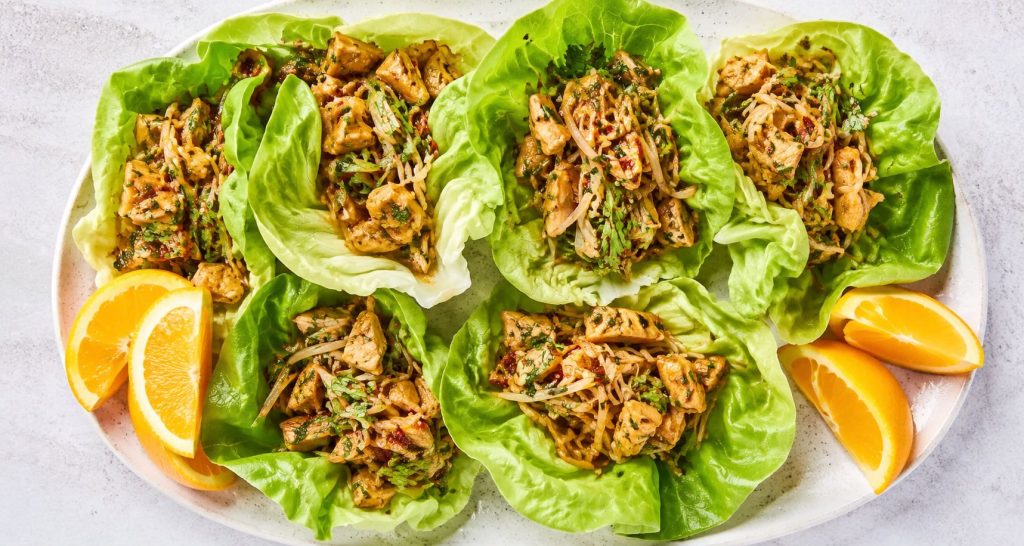
Spicy Asian Lettuce Wraps with Chicken
These spicy Asian lettuce wraps tuck chicken, bean thread noodles, cilantro, soy sauce, chile paste, and sesame oil into crisp lettuce leaves. They are light, saucy, and fast enough for lunch or a casual appetizer plate.

Lettuce Wrap Sandwich With Turkey and Bacon
This lettuce wrap sandwich rolls deli turkey, Swiss cheese, avocado spread, tomato, red onion, and bacon inside crisp lettuce. It gives you the sandwich feel without the bread.
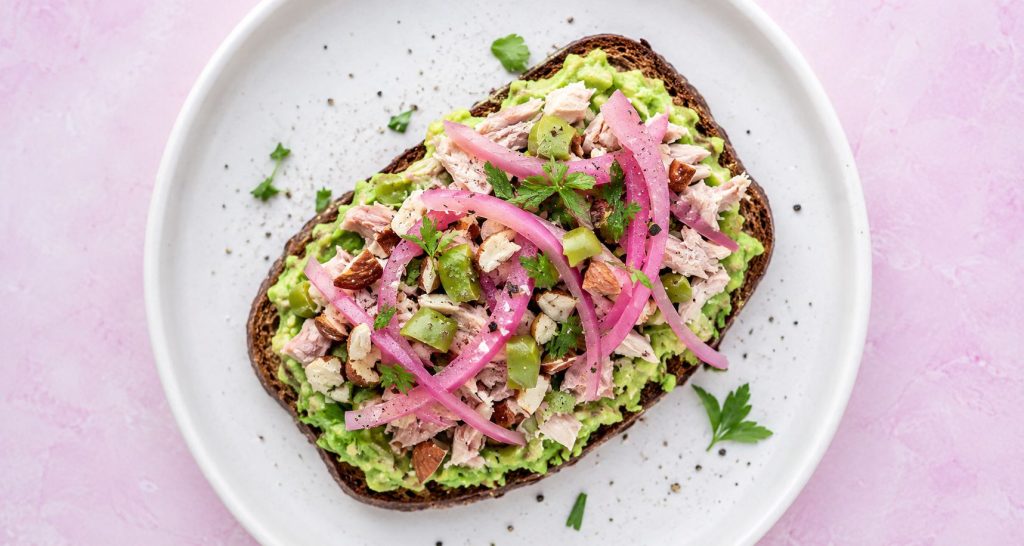
Tuna Avocado Sandwich with Pickled Onion
This tuna avocado sandwich layers quick pickled red onions, creamy avocado, albacore tuna, toasted almonds, Castelvetrano olives, and parsley on toasted whole wheat sourdough. It is bright, crunchy, and lunch-ready.
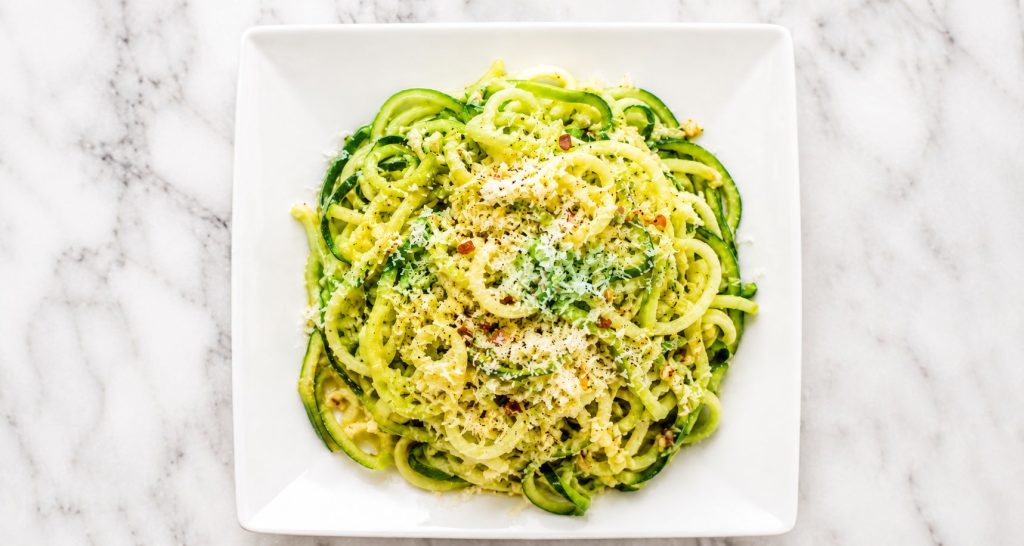
Garlic Parmesan Zucchini Noodles
Garlic parmesan zucchini noodles cook quickly in foaming butter with garlic, salt, pepper, red pepper flakes, and Parmesan.
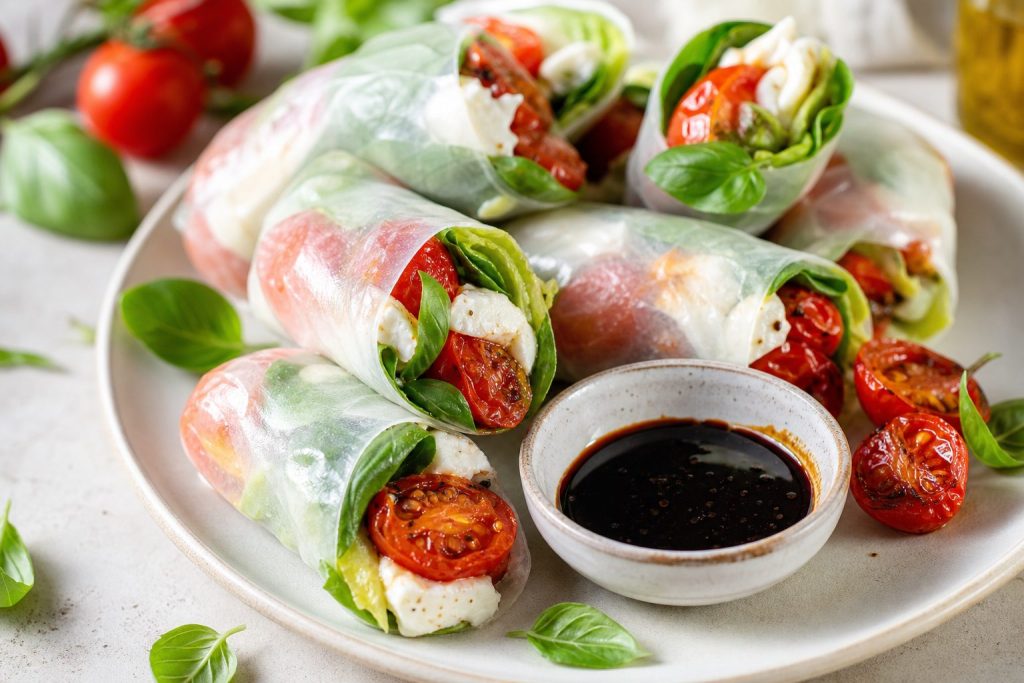
Caprese Summer Rolls with Roasted Tomatoes
Roasted Tomato Caprese Summer Rolls wrap roasted grape tomatoes, mozzarella, basil, romaine, and reduced balsamic into soft rice paper for a fresh appetizer or light lunch.
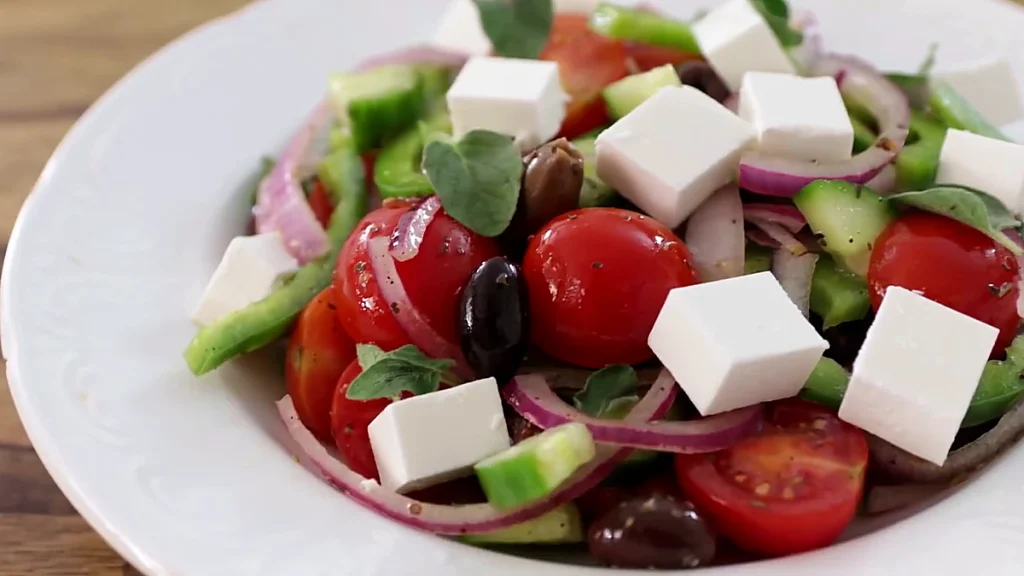
Greek Salad Recipe With Feta and Olives
This Greek salad recipe is a fresh no cook salad with cherry tomatoes, cucumber, green bell pepper, red onion, Kalamata olives, feta, oregano, olive oil, and vinegar.

Chicken Salad Slaw With Peanuts and Nori Recipe • 5★ • 30 min
This no-cook, main-dish slaw is all about texture and toppings. The cabbage and shredded chicken is only the beginning.

Chilled Cucumber Soup With Avocado Toast Recipe • 5★
A chilled cucumber soup, whirled together in the blender to serve as an instant dinner, is one of the quiet rewards of midsummer. The trick to making it hearty enough is to not stint on the seasonings, especially when something as mild as cucumber is the main ingredient.
For When You Want to Fire Up the Grill
90 degrees out, grill already sweating, and yeah, these are still worth stepping outside for. Every last one of them.
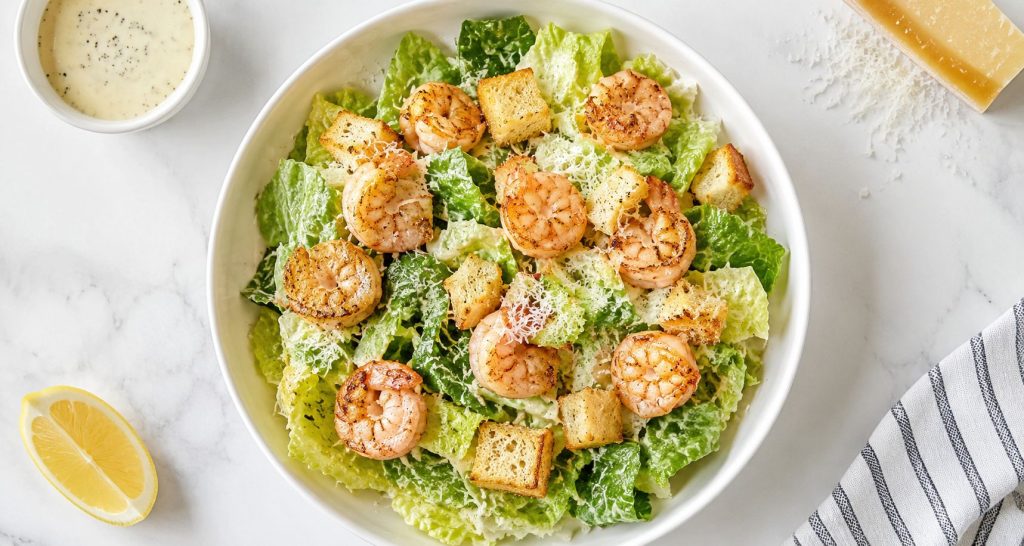
Caesar Salad With Grilled Shrimp
This Caesar salad with grilled shrimp has soy marinated shrimp, crisp romaine, homemade baguette croutons, creamy dressing, lemon, and Parmesan.
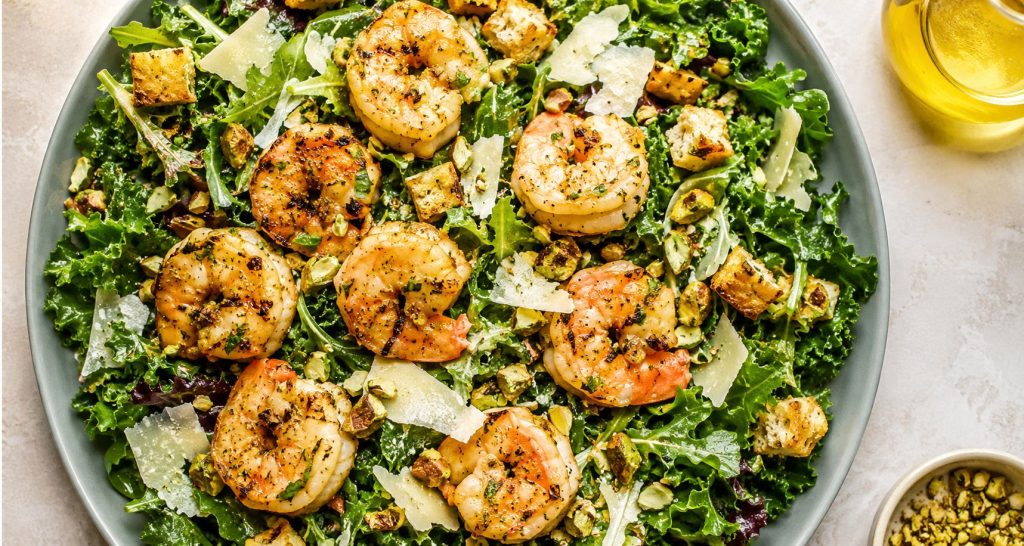
Grilled Citrus Shrimp Salad with Pistachios
This grilled citrus shrimp salad has orange marinated shrimp, baby kale, Parmesan, croutons, and pistachios.
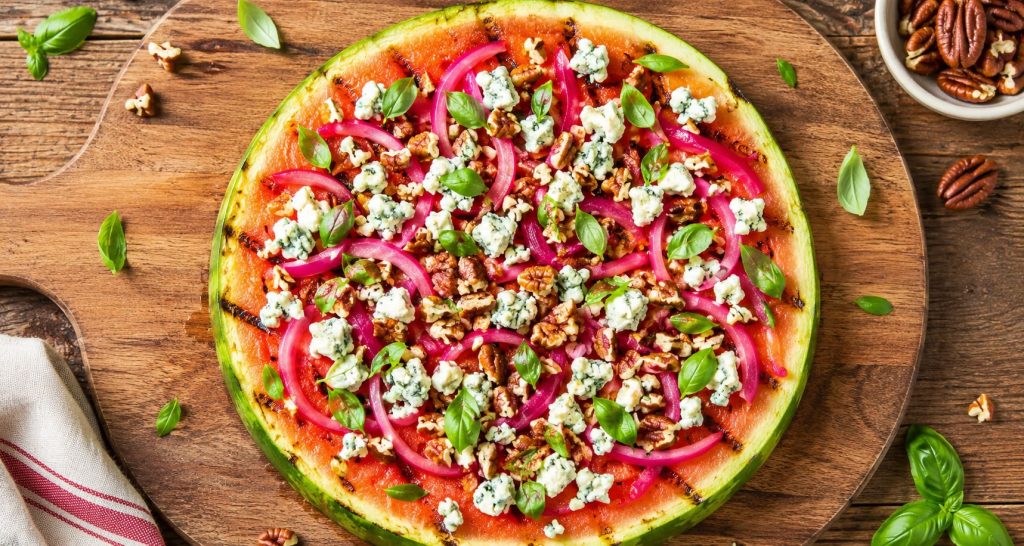
Grilled Watermelon Pizza With Blue Cheese
This grilled watermelon pizza is topped with quick pickled red onion, creamy blue cheese, chopped pecans, and basil for a sweet, smoky, salty appetizer.
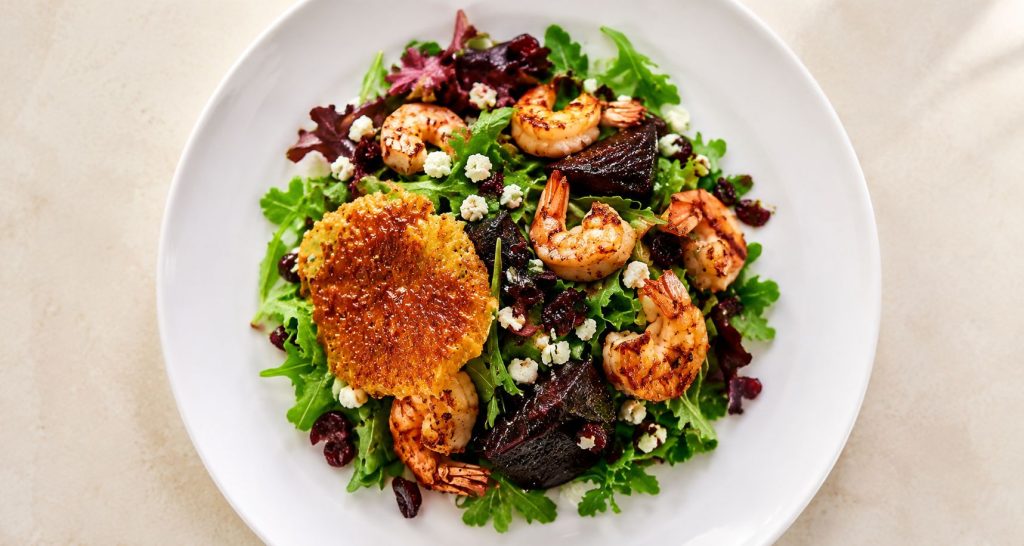
Blackened Barbecue Shrimp Salad
This blackened barbecue shrimp salad piles broiled glazed shrimp and warm cinnamon oranges over dressed greens with goat cheese, almonds, and cranberries, with a creamy orange dream shake on the side.
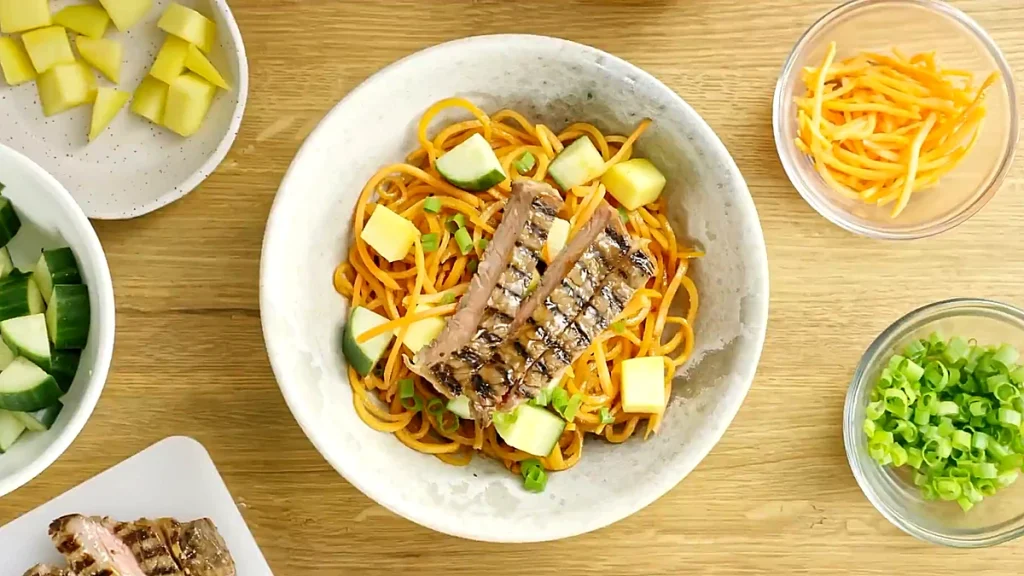
Sweet Potato Spiral Bowl with Teriyaki Steak
This sweet potato spiral bowl with teriyaki steak layers sesame cooked sweet potato spirals with ribeye, cucumber, mango, green onions, cilantro, and lime.
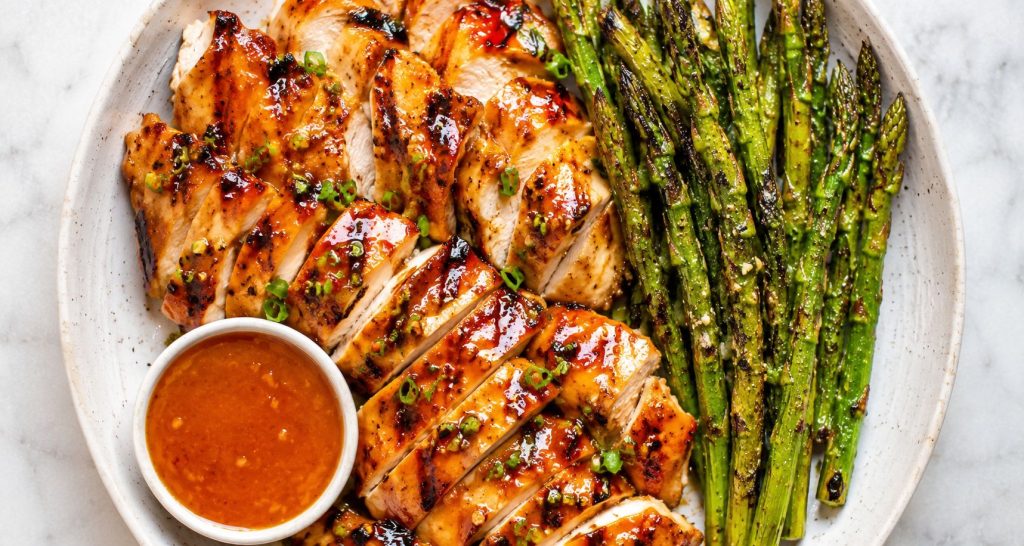
Peach Chicken with Chargrilled Asparagus
Peach Chicken with Chargrilled Asparagus is a sweet, smoky, and lightly spicy grilled chicken dinner with a glossy peach glaze and garlicky grilled asparagus.
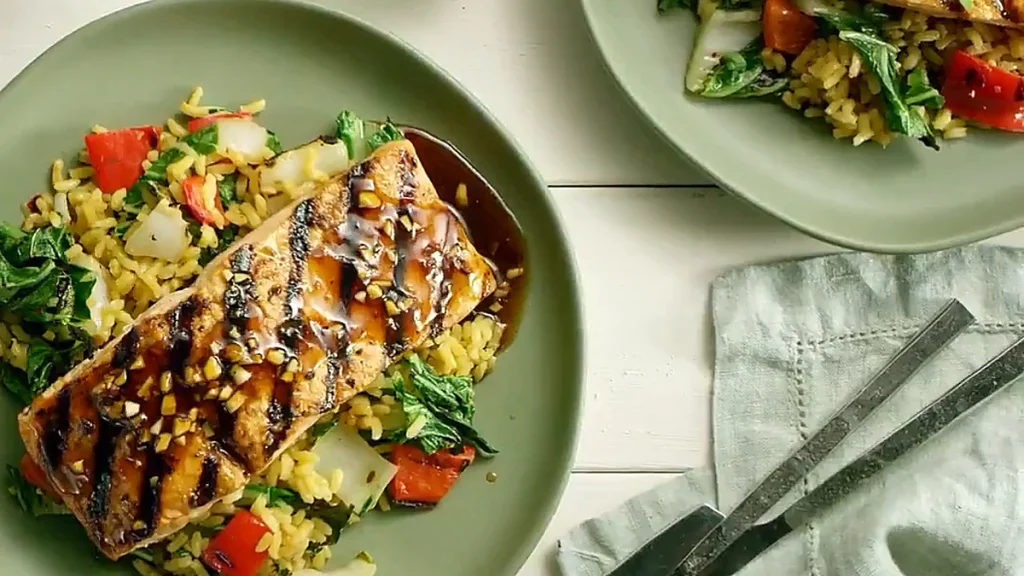
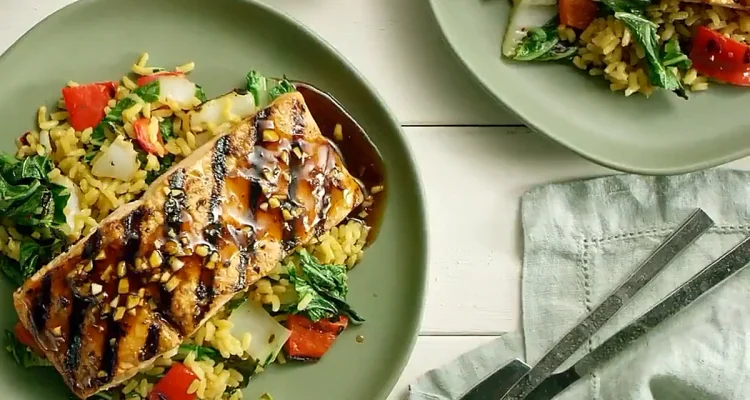
Citrus Balsamic Grilled Salmon Salad
This grilled salmon rests in a quick citrus balsamic marinade and sits over a warm brown rice salad tossed with grilled bok choy, red pepper, and fresh herbs.
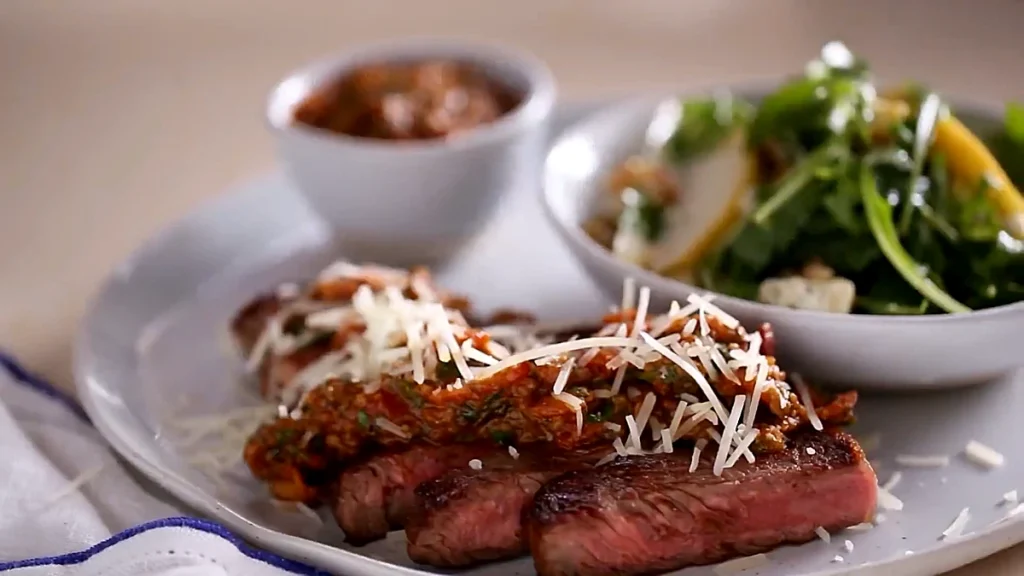
Steak with Mushroom Marinara and Pear Salad
This steak dinner brings full steakhouse vibes with a rich, spicy mushroom marinara spooned over a perfectly seared steak. The pear arugula salad adds sweetness, crunch, and freshness, making it feel special without being too heavy.
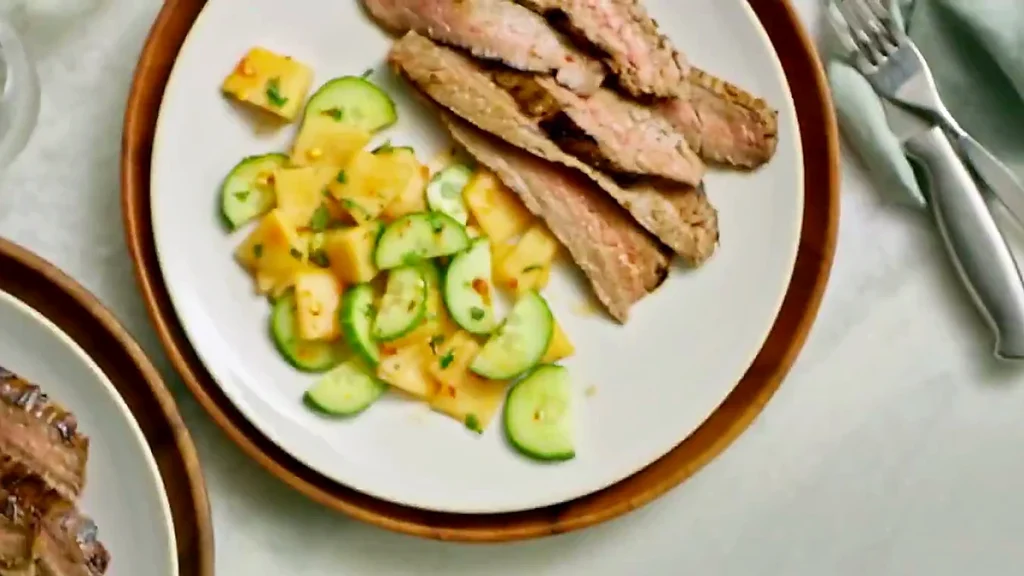
Chili Herb Steak with Melon Cucumber Salad
Chili herb steak is marinated with lime, herbs, chili garlic sauce, and honey, then grilled and served with a cool melon cucumber salad
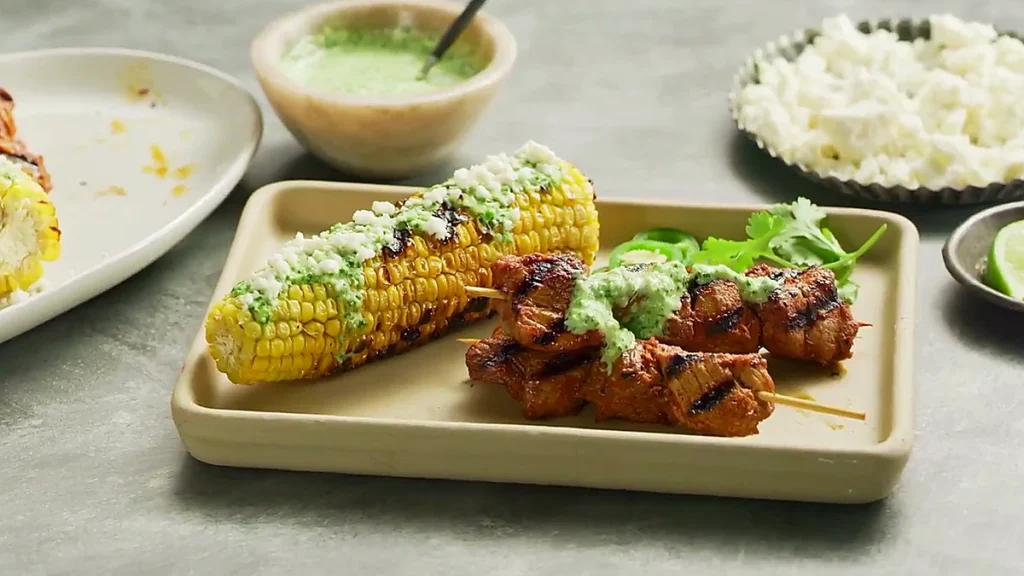
Aji Verde Pork Skewers with Grilled Corn
Aji verde pork skewers are grilled until smoky, then served with saucy grilled corn, queso fresco, lime, and a creamy green herb sauce.

Grilled Butterflied Chicken with Garlic Butter
Grilled Butterflied Chicken with Garlic Butter recipe – tender meat, crispy skin, and a butter baste on the grill.
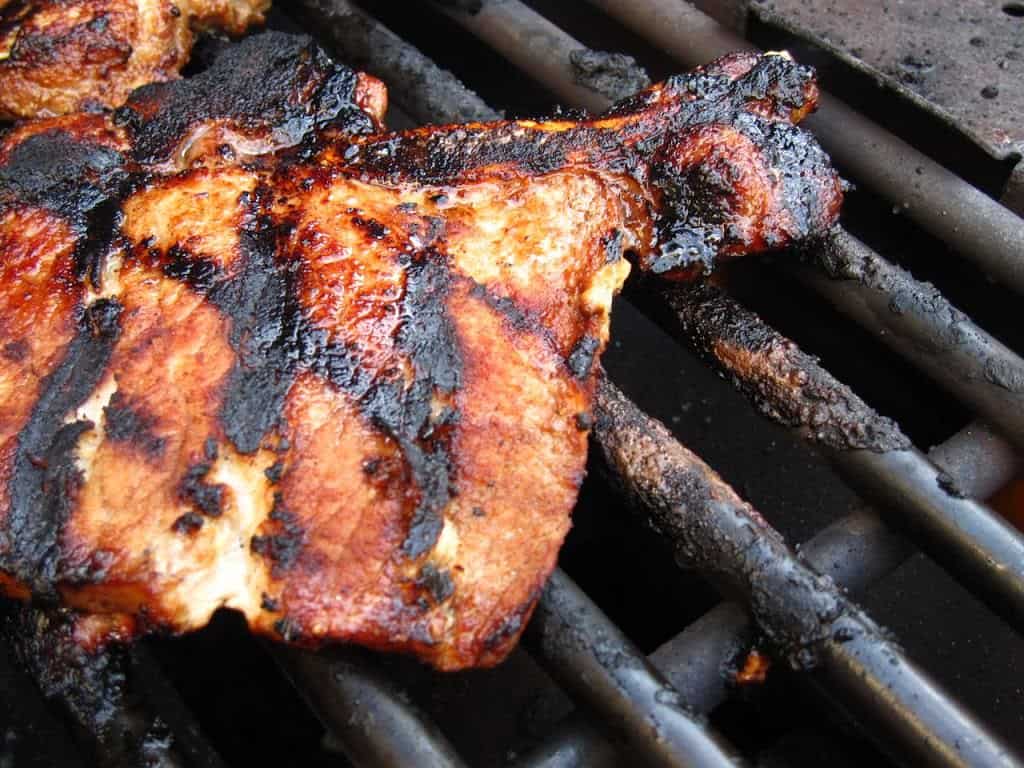
Grilled Thin Pork Chops, Quick Brinerated
Grilled Thin Pork Chops, Quick Brinerated. My recipe for thin-cut pork chops, grilled quickly on only one side.
For Healthy Summer Plates
Light enough for the days when it’s too hot to do much of anything, filling enough to still count as a real dinner.
And nope, no guilt for making them on repeat.
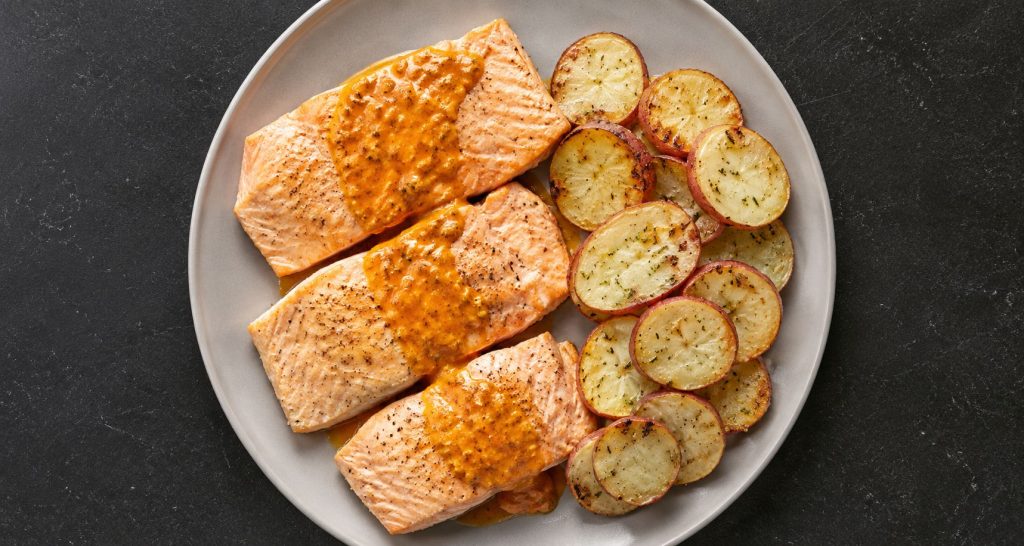
Salmon and Warm Vegetable Salad
Salmon bakes on one sheet pan with lemon potatoes and grape tomatoes, the tomatoes blend into a silky salted butter sauce, and a warm zucchini arugula salad rounds out the plate.
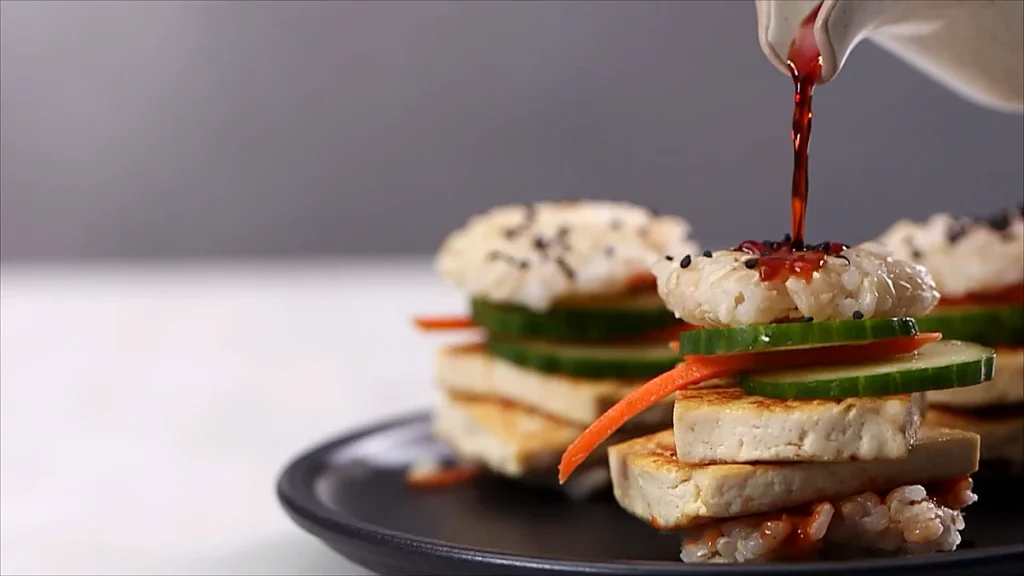
Sushi Sliders With Tofu And Rice Buns
These sushi sliders stack sticky rice buns with teriyaki tofu, cucumber, carrots, furikake, and gochujang sauce. They are small, fun, and easy to serve as snacks or appetizers.
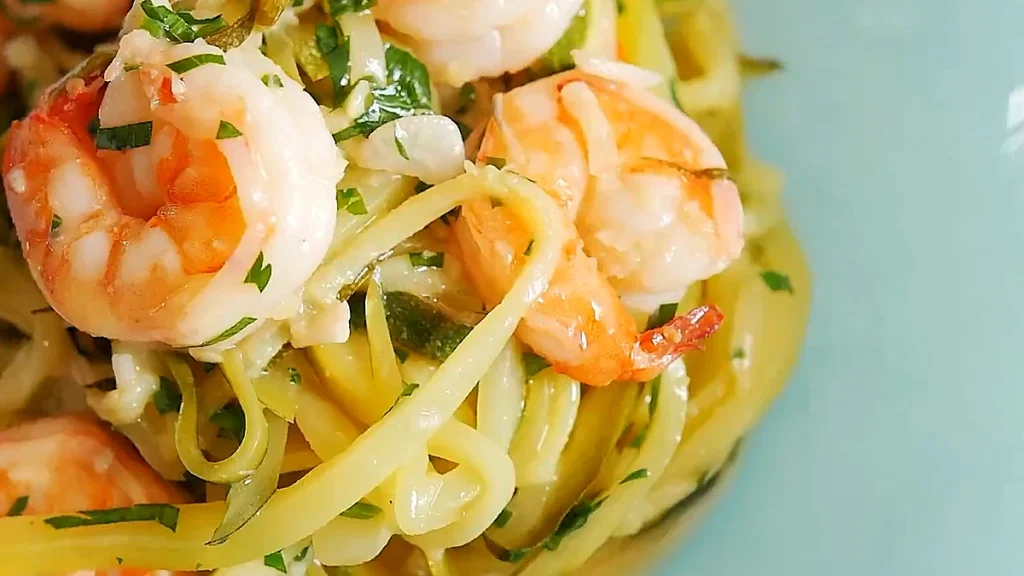
Zucchini Noodles with Shrimp
Zucchini noodles with shrimp are cooked in olive oil, crushed garlic, lemon juice, white wine, salt, pepper, and fresh parsley for a light low carb dinner.
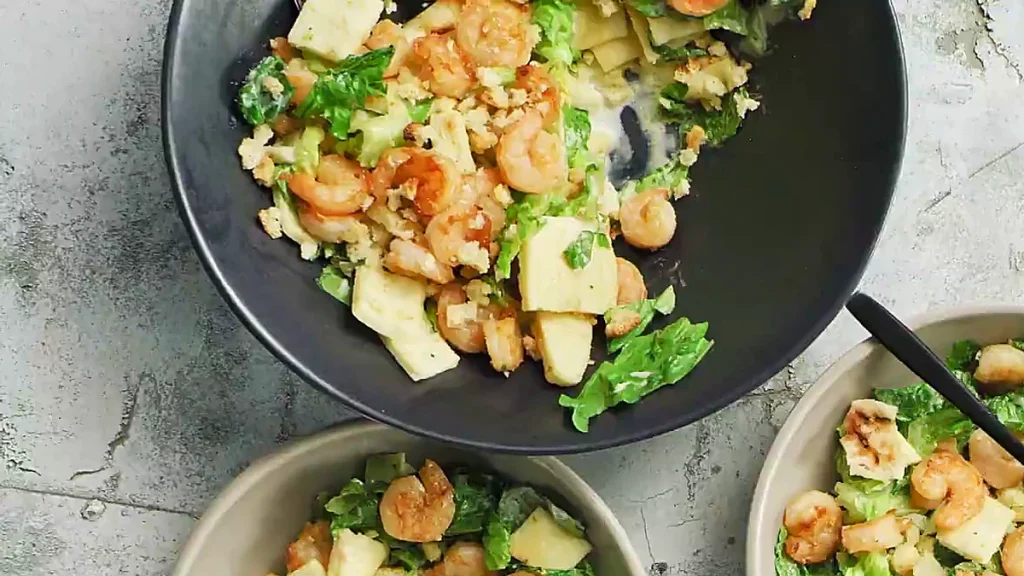
Spicy Shrimp Panzanella With Naan
This spicy shrimp panzanella is made with chipotle glazed shrimp, warm naan, lime Caesar dressing, romaine, and crunchy croutons.
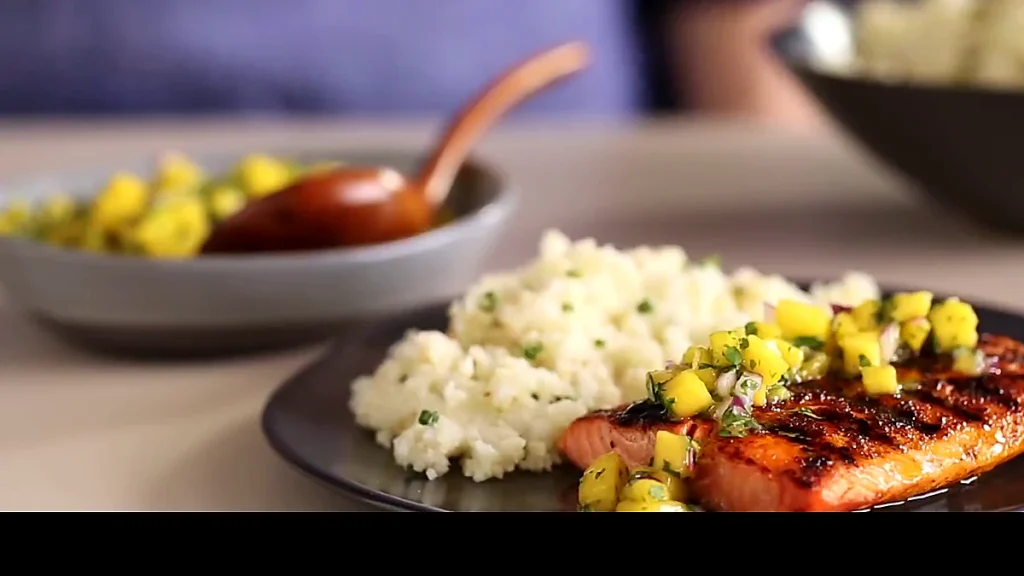
Spiced Salmon With Mango Salsa
This spiced salmon with mango salsa is grilled with smoked paprika, cumin, and chili powder, then served with mango salsa and cauliflower hominy rice.
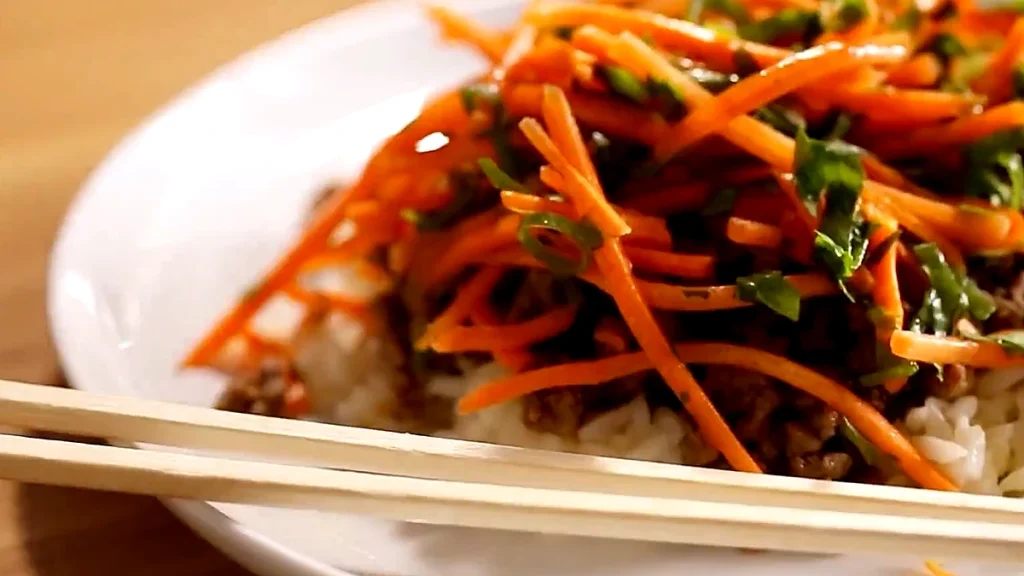
Thai Beef with Carrot Basil Salad
Thai beef with carrot basil salad is a quick rice bowl with saucy ground beef, jasmine rice, and a crisp carrot herb salad.
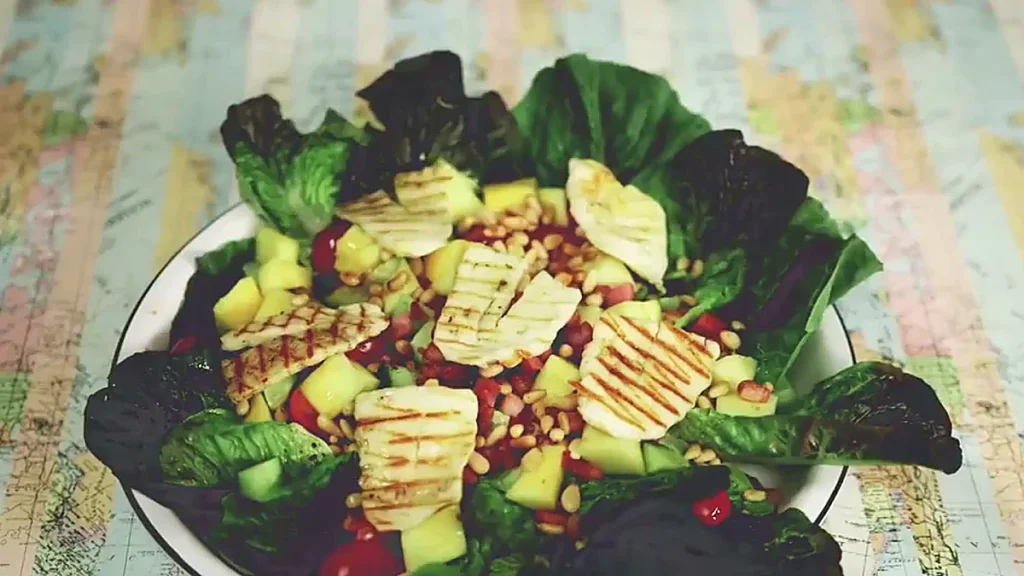
Mango Pancetta Salad With Halloumi
This mango pancetta salad is a sweet salty salad with lettuce, tomato, cucumber, mango, crispy pancetta, toasted pine nuts, grilled halloumi, and balsamic dressing.
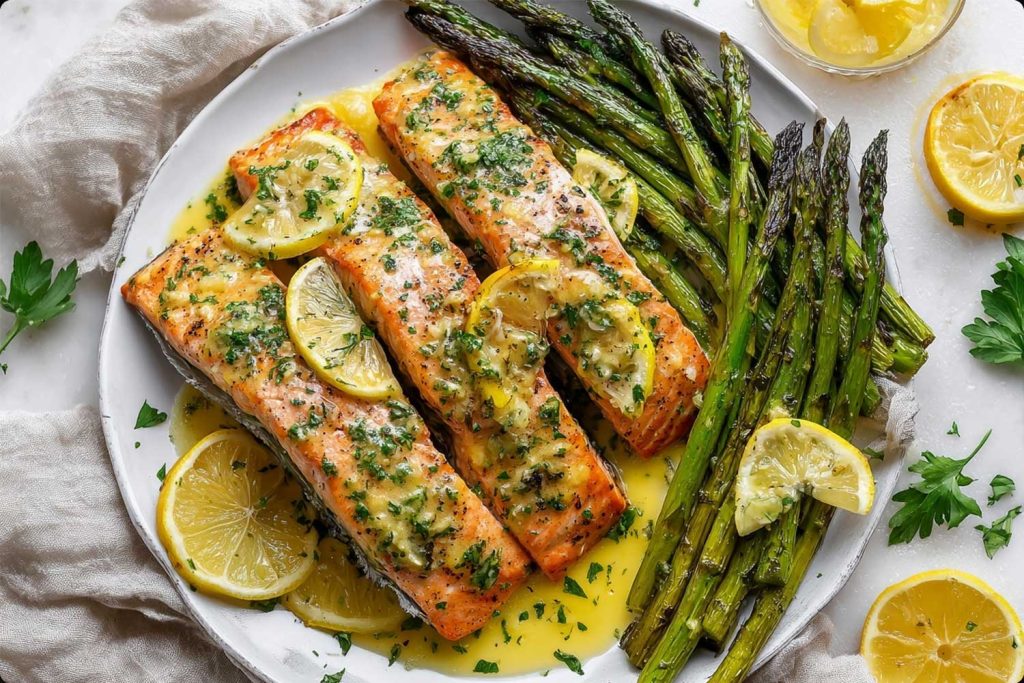
Baked Salmon in Foil with Asparagus and Lemon Garlic
This baked salmon in foil with asparagus and lemon garlic butter sauce is an easy, healthy dinner that’s full of fresh flavor and ready in about 20 minutes. Tender, flaky salmon and crisp-tender asparagus cook together in foil packets for a no-mess, perfectly balanced meal bursting with lemon, garlic, and buttery goodness. Ideal for weeknights, date nights, or when you just need something delicious and simple.
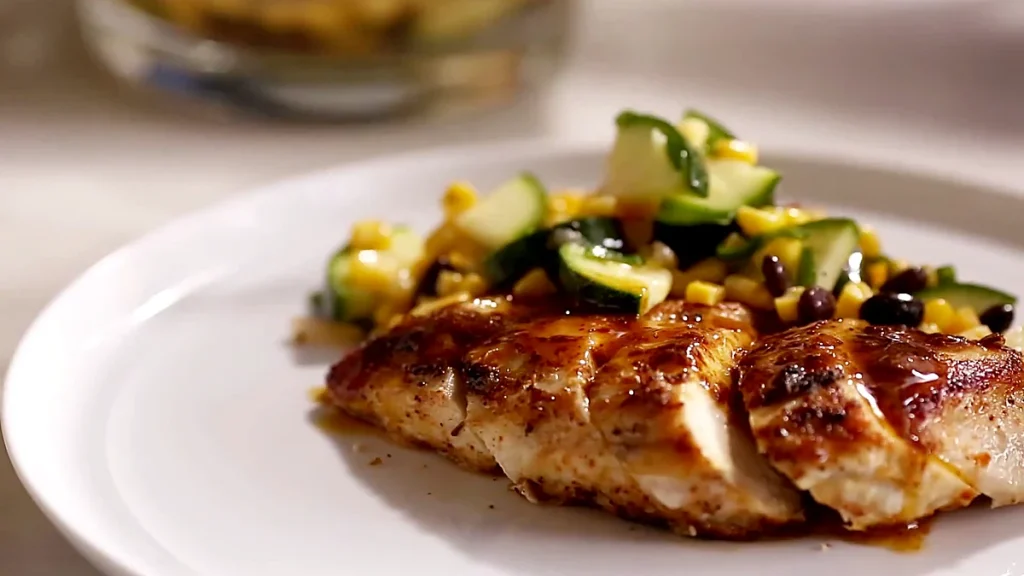
Lime Chicken with Corn and Zucchini Salad
This lime chicken with corn and zucchini salad is a skillet chicken dinner with a honey lime vegetable salad and warm pan sauce.
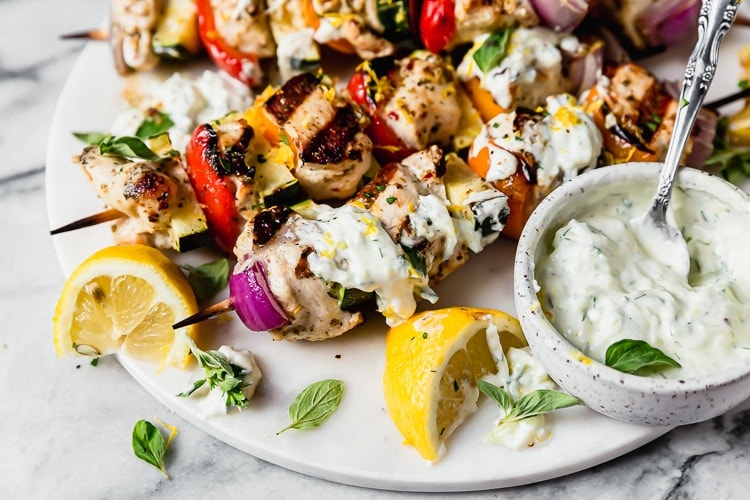
Greek Chicken Kebabs with Tzatziki Sauce
Marinated in Greek flavors then grilled to perfection, Greek Chicken Kebabs with Tzatziki make for an easy, flavorful & healthy dinner! Whole30-friendly

Feta Spinach Grilled Turkey Burgers
Feta Spinach Grilled Turkey Burgers aren’t just any ol’ turkey burger! They’re made with garlic, spinach and feta and are incredibly juicy and flavorful.
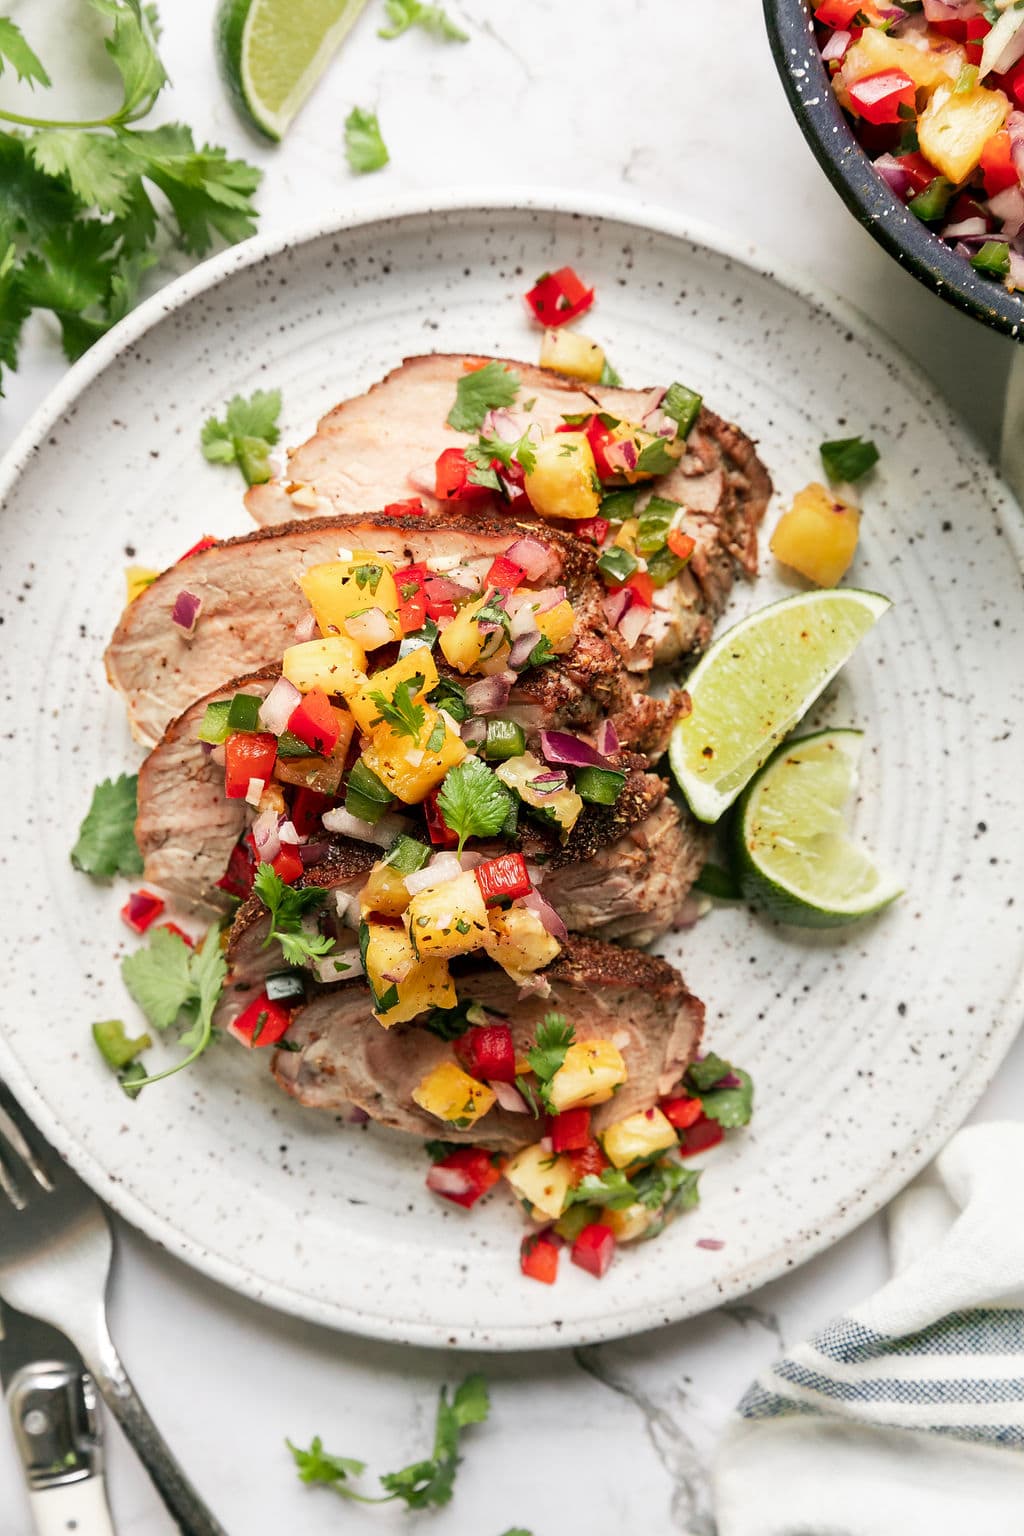
Grilled Pork Tenderloin with Pineapple Salsa (Fast and Easy)
Grilled Pork Tenderloin with Pineapple Salsa is a delicious and healthy way to mix it up on busy weeknights. Serves 4. Total time: 45 mins
For Family Dinner Wins
The ones that the whole table actually clears, even the picky kid. Easy enough for a Tuesday when nobody’s got it in them to negotiate dinner.
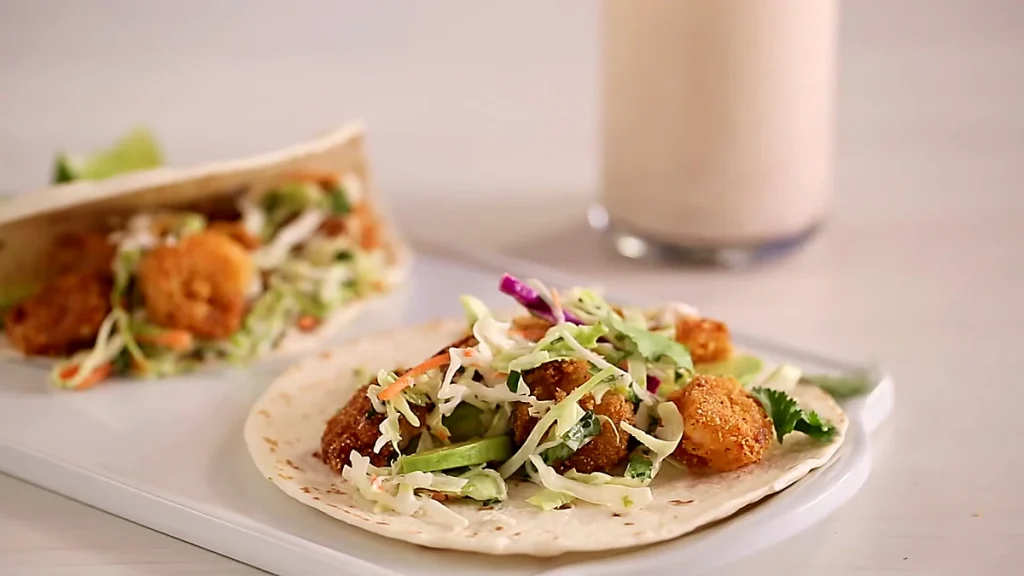
Crispy Baja Shrimp Tacos
Crispy Baja shrimp tacos are made with golden fried shrimp, creamy lime slaw, avocado, and small flour tortillas. They are crunchy, fresh, and easy to build for taco night.
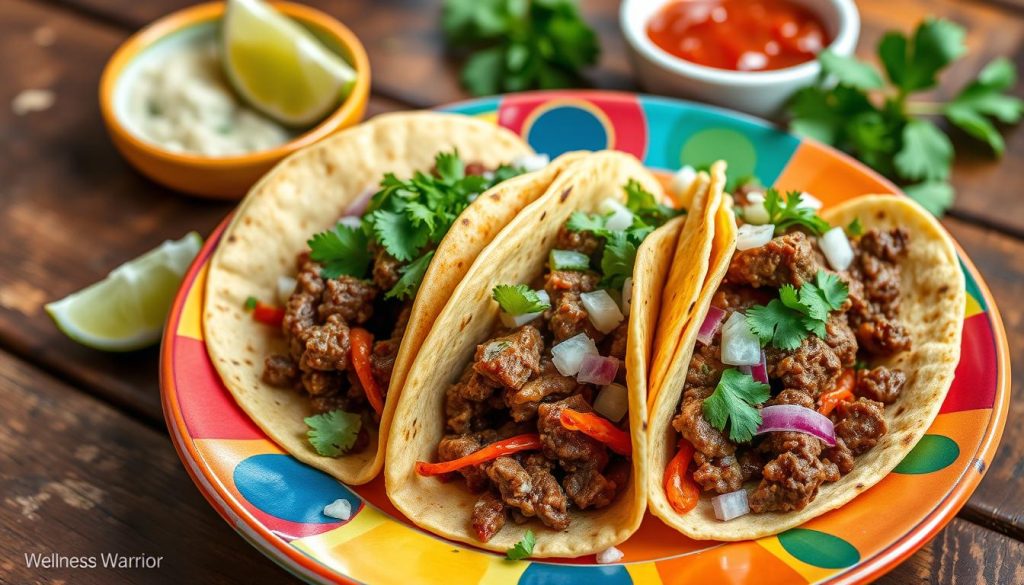
Easy Beef Tacos Recipe: Authentic Mexican Flavor
Did you know a pound of lean ground beef can make 12 servings of tasty beef tacos? This Easy Beef Tacos recipe brings authentic Mexican taste to your home. It’s great for a quick dinner or Taco Tuesday. The secret is the flavorful ground beef and homemade taco seasoning. Plus, you can make crispy taco shells from scratch. Looking for a Tex-Mex fix or a protein-rich dinner? This recipe is perfect. It takes just 25 minutes to make, bringing Mexican
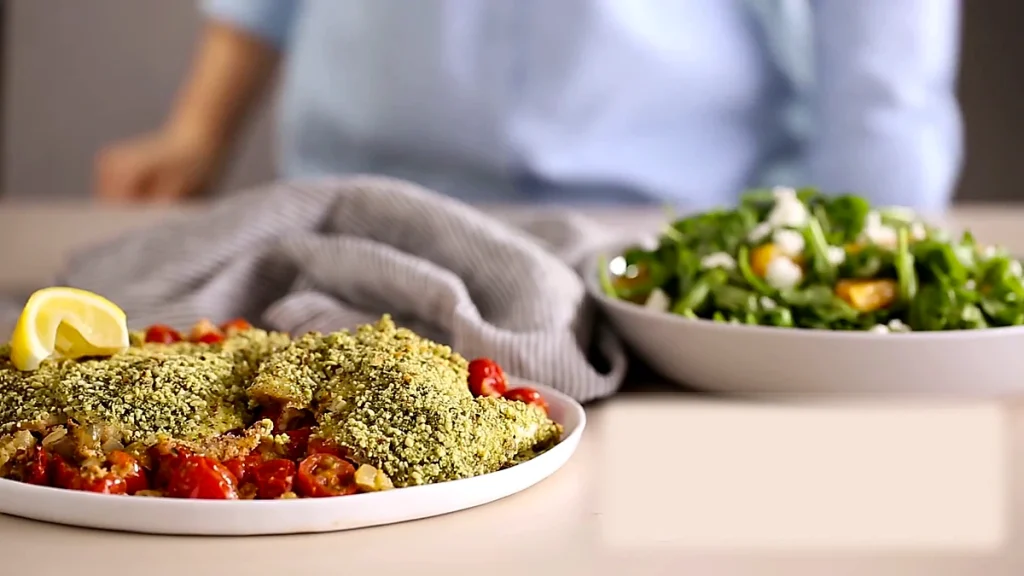
Pesto Fish Tomato Bake With Orange Salad
This pesto fish tomato bake layers almond pesto crusted fish over bubbly tomatoes, onion, pesto mix, butter crumbs, and cheese, with spiced orange arugula salad on the side.
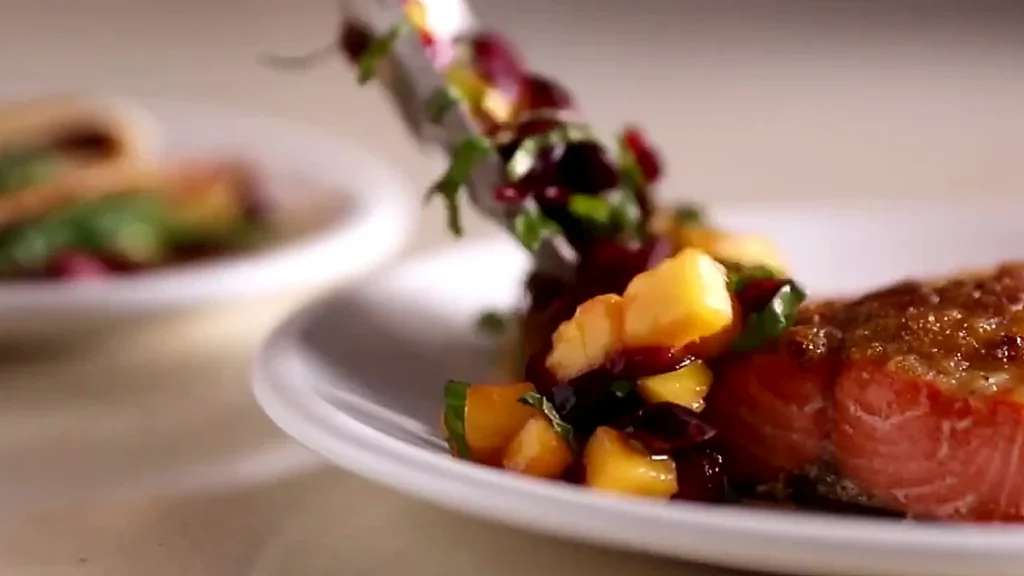
Cherry Mango Salmon with Cherry Quesadillas
This cherry mango salmon has a brown sugar orange topping, a mango cherry herb spoon topping, and savory cherry cheddar quesadillas.
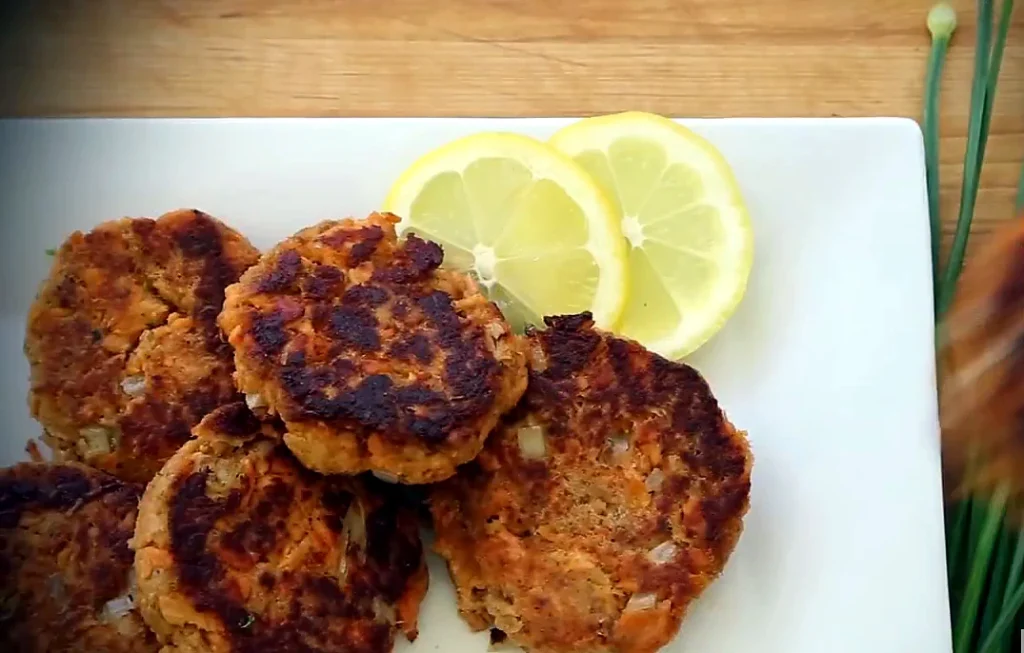
Salmon Patties with Canned Salmon
These salmon patties use canned salmon, egg, onion, seasoned breadcrumbs, and olive oil for a crisp skillet finish. They are simple, golden, and built from pantry basics.
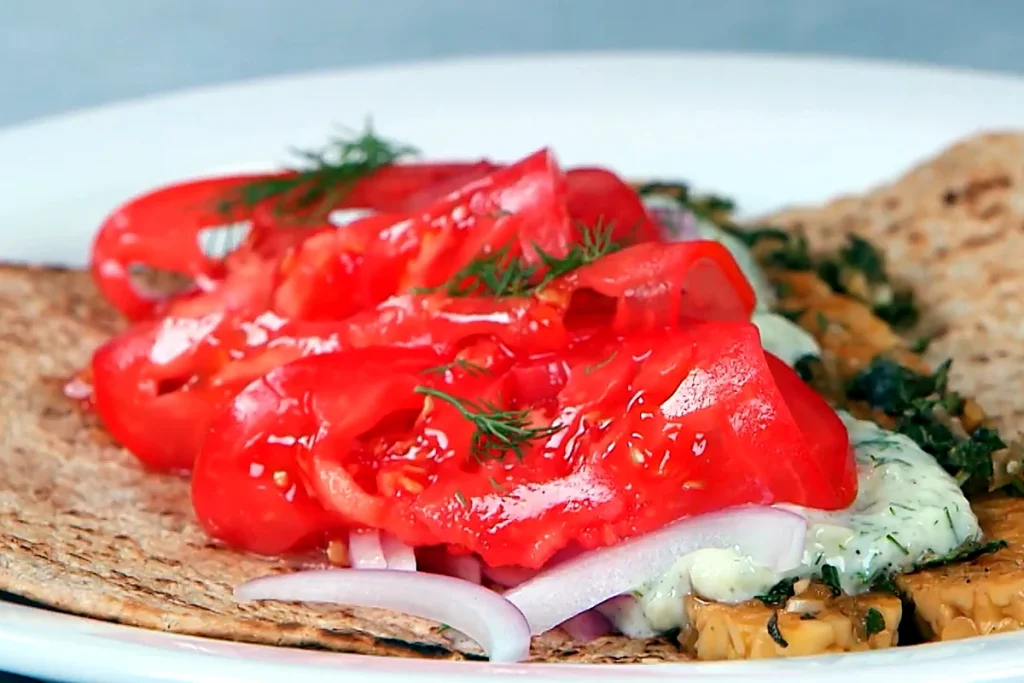
Tempeh Gyros With Tzatziki Sauce
These tempeh gyros are made with braised tempeh strips, silken tofu tzatziki, red onion, tomatoes, and flatbread. They are savory, creamy, and great for a plant-based meal.
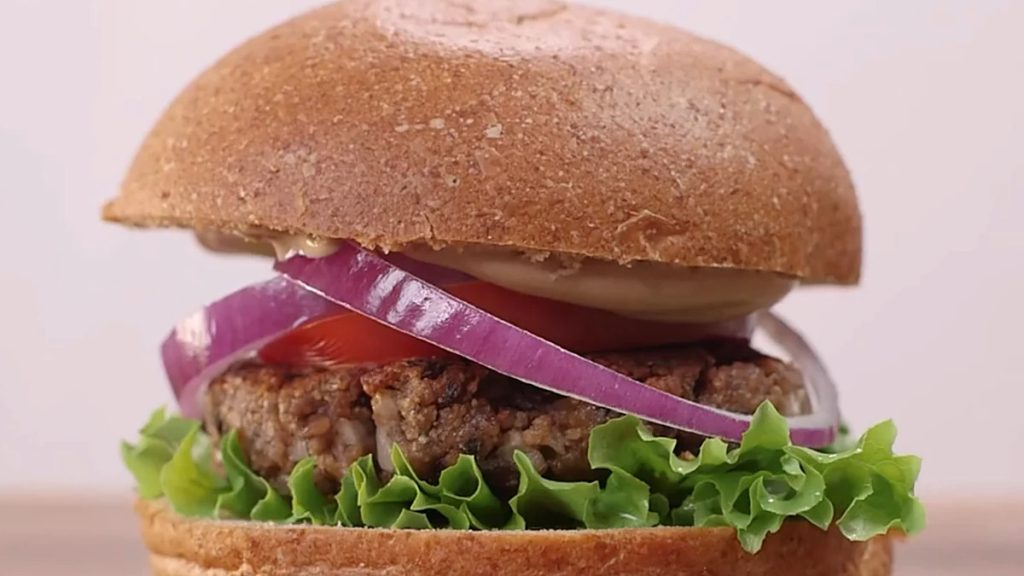
Black Bean Burger
This black bean burger recipe makes sturdy homemade patties with black beans, egg, breadcrumbs, onion, and dried herbs. Serve them on buns with lettuce, tomato, and red onion.
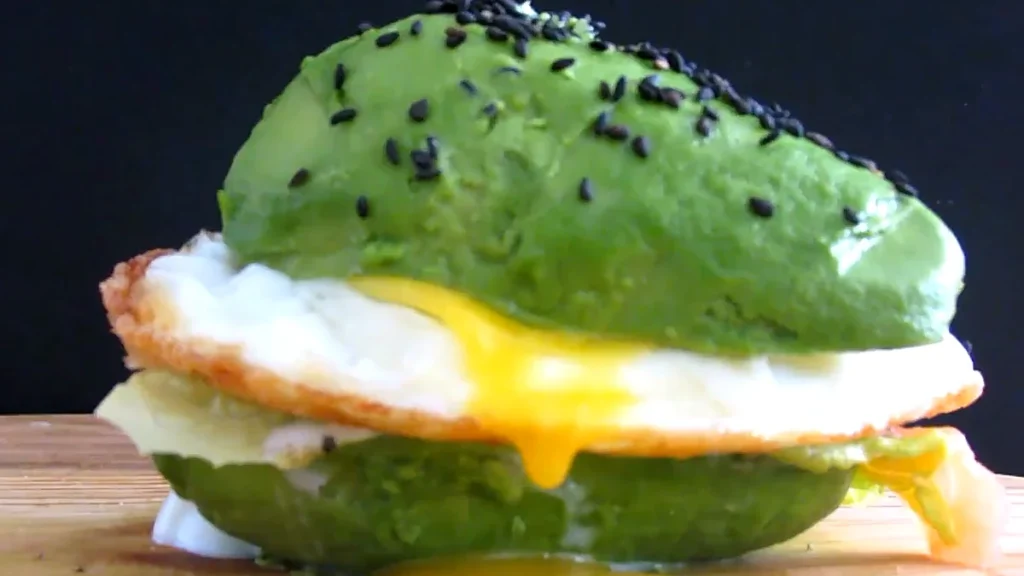
Avocado Burger With Smoked Salmon and Egg
This avocado burger uses avocado halves as the bun with smoked salmon, lettuce, Greek yogurt, and a fried egg. It is rich, fresh, low carb, and ready fast.

Slow-Cooker Jalapeño Pulled Pork Recipe • 5★
This four-ingredient recipe draws inspiration from carnitas, barbecue pulled pork and Vietnamese caramel pork for sticky, sweet and spicy pulled meat. Braising browned pork shoulder in a slow cooker in pickled jalapeño brine and fish sauce tenderizes the meat and adds savory depth.

Roasted Cabbage and Butter Beans Recipe • 5★
Ribbons of cabbage are roasted until they are sweet and caramelized then tossed with butter beans, garlic and anchovies and finished with fresh parsley; the details make this dish surprisingly flavorful for such a simple ingredient list. An easy and affordable way to get dinner on the table, this recipe makes a hearty main dish served with hunks of crusty bread, or a hardworking side dish next to your favorite protein.
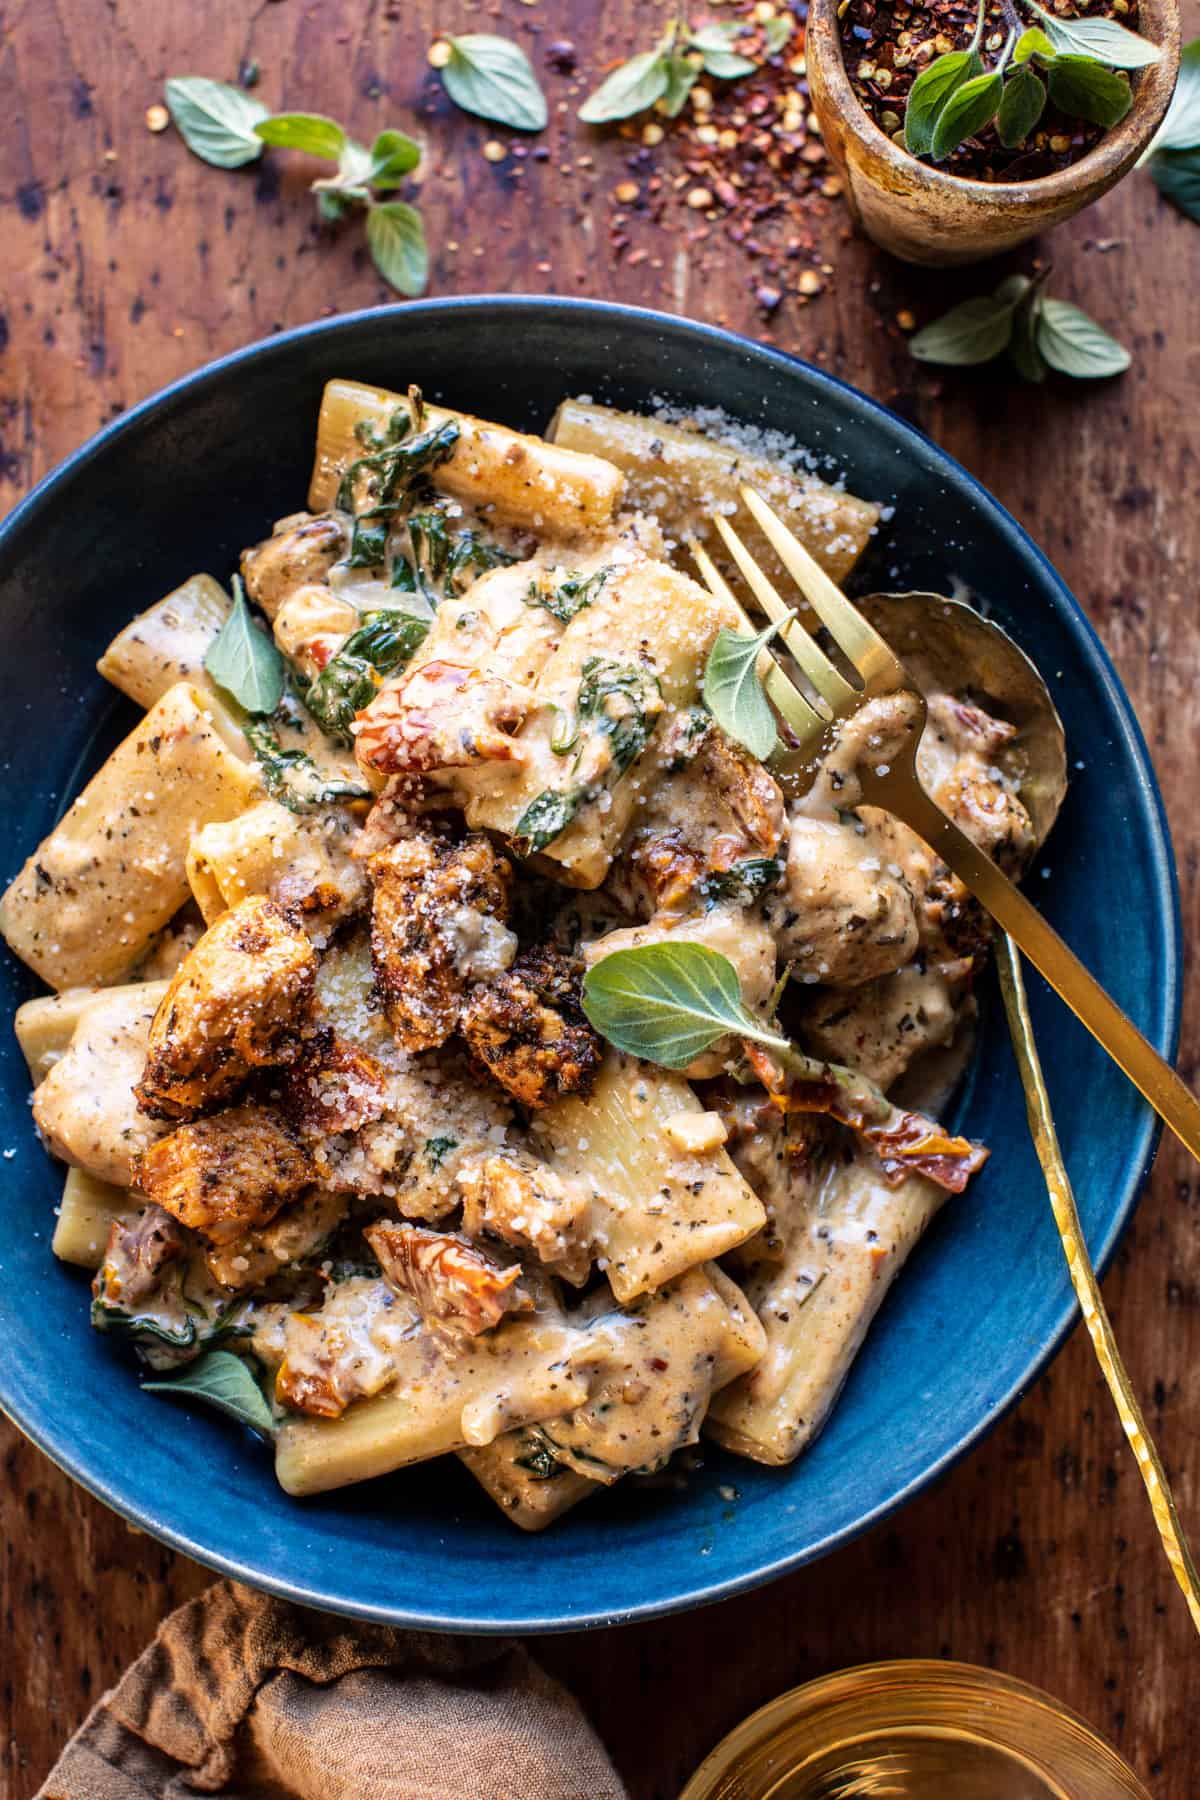
Creamy Sun-Dried Tomato Chicken Pasta.
Creamy Sun-Dried Tomato Chicken Pasta: an all-in-one meal for busy weeknights, equally great for holidays…quick, easy, hearty & delicious!
For Fast Weeknight Dinners
You get home late, starving, the week already winning. These hit the table before anyone notices how little went into them.
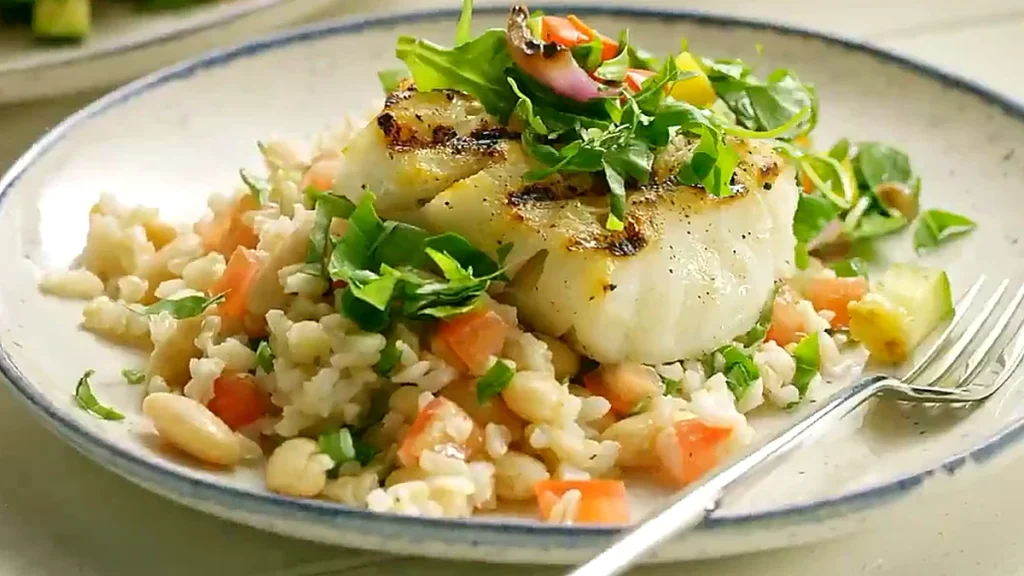
Basil Pepper Fish with Grilled Vegetable Relish
This basil pepper fish has grilled white fish over garlicky white bean and tomato rice, topped with a grilled zucchini and pepper relish tossed with greens and lemon vinaigrette.
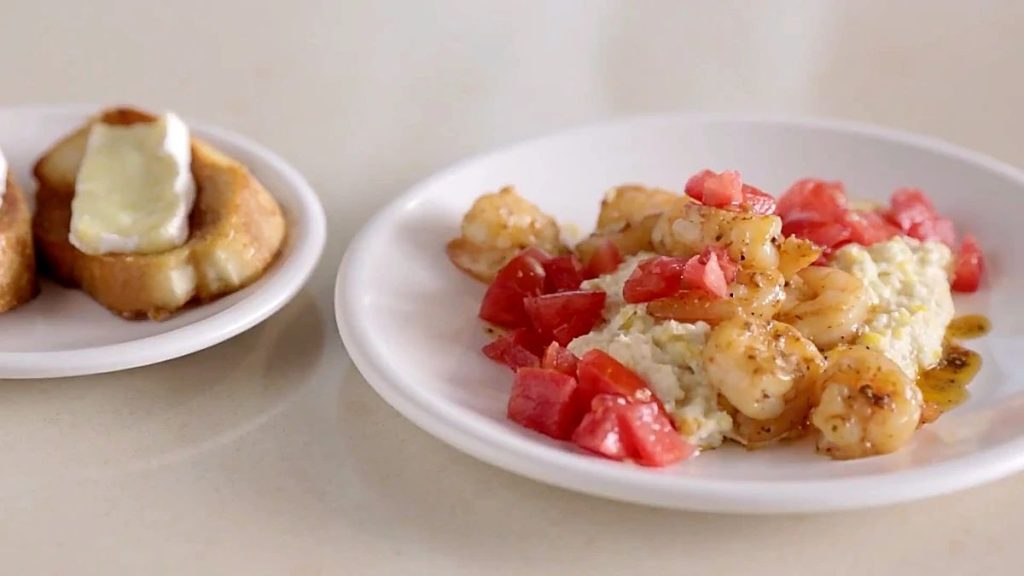
Tomato Garlic Shrimp, Corn and Maple Bread
Buttery garlic shrimp piled over creamy sweet corn and topped with fresh diced tomato, served with maple sticky bread toasted golden in butter and maple syrup.
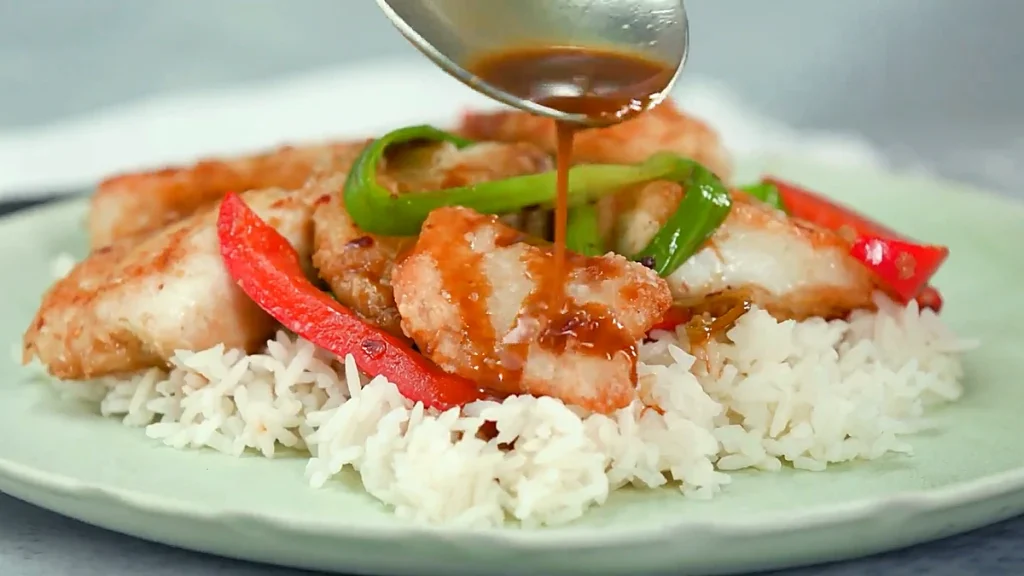
Crispy Fish With Scallions and Peppers
This crispy fish with scallions and peppers has cornstarch and egg white crusted tilapia, fried golden and tossed in a glossy soy sherry sauce with red pepper, served over rice.
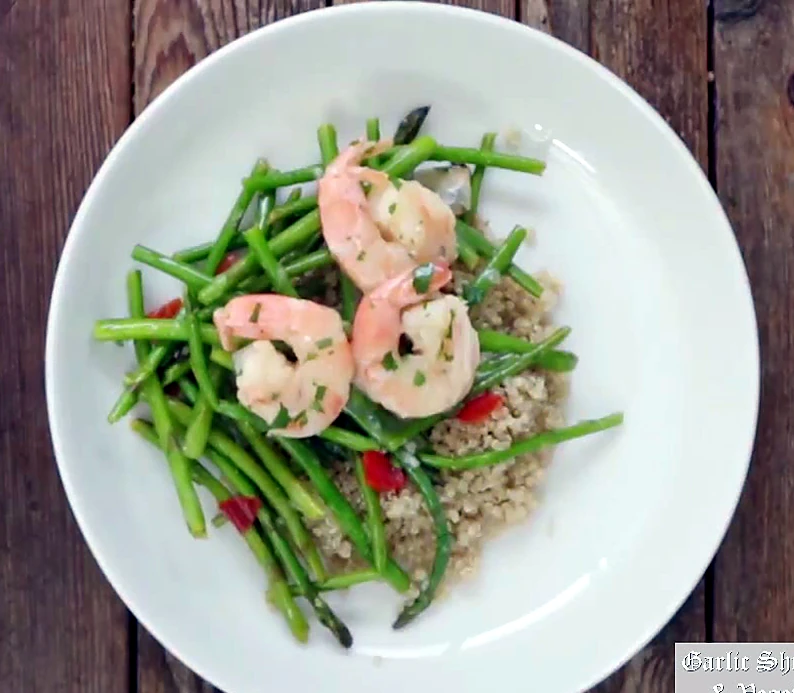
Lemon Garlic Shrimp and Vegetables
This lemon garlic shrimp and vegetables recipe cooks asparagus and red peppers first, then finishes shrimp in a light garlic, broth, lemon, and parsley sauce. Serve it over rice for a clean, bright dinner.
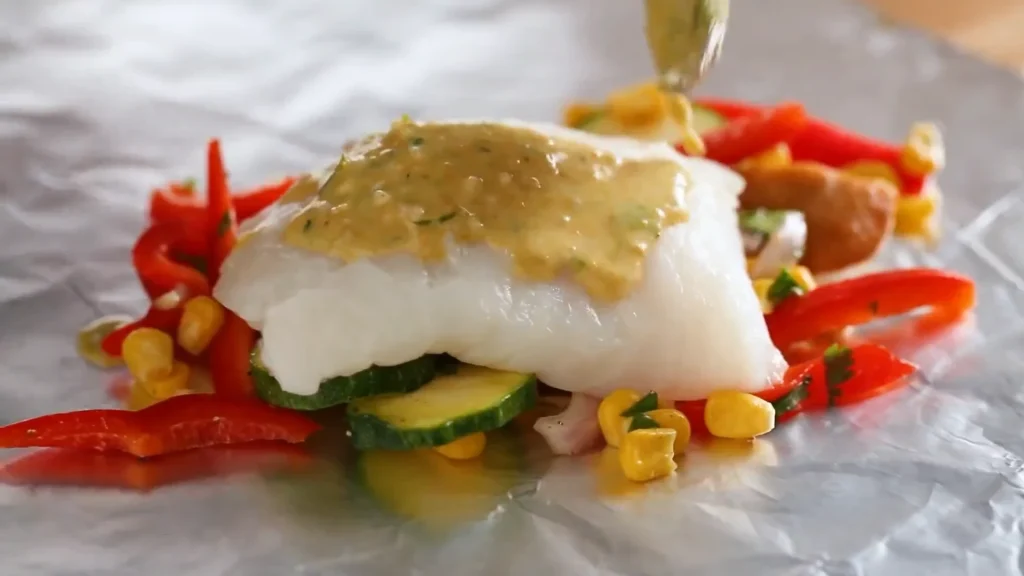
Coconut Curry Fish With Zucchini Foil Packs
This coconut curry fish with zucchini bakes white fish fillets in foil packets over zucchini, corn, shiitake mushrooms, shallots, and red bell pepper, with a green curry coconut milk sauce.
Creamy Shrimp Verde With Spiced Rice
This creamy shrimp verde with spiced rice layers juicy shrimp in a cilantro green onion cream sauce over pepper and cumin rice mixed with black beans.

Parmesan Garlic Butter Crusted Halibut
Buttery, crispy, and full of garlicky Parmesan flavor. This baked halibut is easy to make and perfect with rice, pasta, or a fresh salad. A new weeknight favorite! ð¤ð
55 recipes is a lot, yea.
But summer’s long.
And the same three meals get old real fast.
The whole point was options that fit the season. Meals for the hot days that won’t have you sweating it out in a 90-degree kitchen.
Easy ones that don’t skimp on flavor.
Family dinners, everybody can actually agree on, which is its own small miracle.
Maybe you went straight for the grilled chicken.
Maybe the no oven stuff.
Either way, hopefully something clicked.
Keep this one saved.
Summer dinner ideas are exactly the thing you want on a Tuesday at 5:45 when your brain’s completely checked out and you just need food to happen.
That’s what this was for.