
Alright, you’re here because you’ve probably seen those shiny little seaweed packs in stores, and maybe you’ve bought them once or twice. Crunchy, salty, kind of weird at first… but then, bam—they grow on you. The only problem? Either they cost too much, have stuff in them you can’t even pronounce, or they just don’t taste quite right.
So let’s fix that.
We’re gonna make seaweed snack sheets at home. And not just any kind. These are keto-friendly, full of flavor, easy to whip up, and once you get the hang of it, you’ll be making them with your eyes closed.
And if you’ve never worked with seaweed before? Don’t worry. I’ll walk you through every step like I’m right there in your kitchen. Let’s roll.
First, What Is Seaweed and Why Should You Even Care?
Seaweed’s been around forever. It’s popular in places like Japan and Korea, where folks have been eating it daily—on rice, in soups, wrapped around sushi. It’s light, low-carb, and packed with minerals like iodine, which your thyroid loves.
For keto folks, it’s a dream. No sugar. No flour. Just natural crunch and salt. And the best part? It can actually satisfy that “I want something salty and crunchy” feeling without making you feel like you messed up your diet.
Alright, let’s get to the kitchen.
Ingredients You’ll Need
This part’s easy. You don’t need a ton of stuff. You probably have most of it already.
Main Stuff:
-
Roasted seaweed (nori) sheets – These are the big, flat sheets you usually see in sushi. Get the plain kind.
-
Avocado oil or olive oil – You want a good, mild oil that won’t overpower the seaweed.
-
Salt – Sea salt or Himalayan if you’re fancy. Regular works too.
-
Garlic powder (optional) – Adds a little punch.
-
Sesame oil (optional) – Tiny bit goes a long way for flavor.
-
Toasted sesame seeds (optional) – Adds a bit of texture.
That’s it. No flour, no weird gums, no sugar. Just good stuff.
Tools You’ll Need
-
Oven or air fryer (I’ll show you both ways)
-
Baking sheet
-
Parchment paper
-
Pastry brush or clean hands (either one works)
-
Scissors or a sharp knife
-
Small bowl for oil mix
Nothing fancy, no gadgets that cost a hundred bucks. You’re good.
Step-by-Step: How To Make Seaweed Snack Sheets

Step 1: Preheat the Oven (Or Air Fryer)
Oven: Set it to 275°F (135°C). Don’t go hotter. Seaweed is thin and burns real fast.
Air fryer: Set to 270°F or the lowest setting you’ve got.
Step 2: Get Your Oil Mix Ready
In a small bowl, mix about:
-
1 tablespoon of avocado oil
-
A few drops of sesame oil (optional)
-
A small pinch of salt
-
A little garlic powder if you like
Stir it up with a spoon.
Step 3: Cut the Nori Sheets
Cut each seaweed sheet into rectangles or squares—whatever shape you want. Scissors work best. I usually cut one big sheet into 6 smaller ones. Don’t worry if the edges aren’t perfect. We’re not selling them; we’re eating them.
Step 4: Brush and Stack
Take two cut pieces. Brush one side of the first sheet lightly with the oil mix. Just a thin layer—don’t soak it. Then, press a second piece on top like a sandwich. This makes it thicker and gives it a satisfying crunch. Brush the top side, too.
Do this for all your pieces.
Step 5: Bake or Air Fry
Oven: Place your seaweed sandwiches on a parchment-lined baking tray. Try not to let them overlap. Pop it in the oven for about 10–12 minutes. Keep your eyes on it around minute 9. If it starts to curl or brown, take it out.
Air Fryer: Lay them flat in the basket. You might need to do a few batches. Cook for about 7–8 minutes. Check often. They should feel crisp and dry—not burnt.
Step 6: Cool and Snack
Let them cool for a couple of minutes. They crisp up more as they cool. Sprinkle toasted sesame seeds on top if you want to get fancy.
What Do These keto Seaweed Snack Sheets Taste Like?
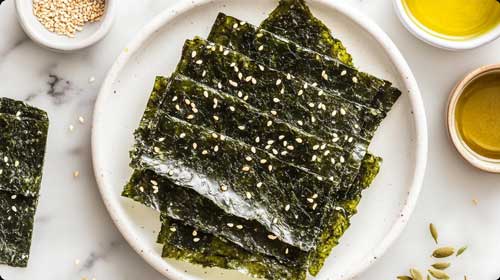
They’re salty, a little nutty (thanks to the sesame oil), and super crunchy. If you’ve ever had roasted seaweed snacks from the store, these are a little thicker and way more flavorful.
Some people like to sprinkle chili flakes on top. Others do a light brush of coconut aminos for a “soy sauce” flavor. You can mess with flavors once you’ve got the basic method down.
How to Store Them
If you’ve made a big batch (which I usually do), let them cool completely. Then, store them in an airtight container or zip-top bag. Stick a little dry rice in there to keep them from getting soft—it soaks up any moisture.
They should stay crisp for a few days. Though, if you’re like me, they’ll be gone by tomorrow.
Are These Really Keto?
Yep. Let’s break it down:
-
Nori sheets = 0 net carbs
-
Oils = 0 carbs
-
Garlic powder = tiny bit of carbs, but barely any if you use a pinch
-
Sesame seeds = less than 1g net carb per tablespoon
So you’re looking at snacks with maybe 0.5g of carbs per serving, max. That’s a win.
Why Not Just Buy Them?
Good question. Store-bought seaweed snacks are okay, but they:
-
Cost more (especially the keto-friendly ones)
-
Sometimes have added sugar or weird ingredients
-
Are usually super thin and tear apart easily
Making them at home means:
-
You pick the oil (healthy fats only)
-
You control the salt
-
You can make them thicker, crispier, and add your own flavors
And it’s kind of fun. Once you start making them, you’ll wonder why you didn’t do it sooner.
Fun Flavor Ideas
If you want to switch it up, here’s a few things I’ve tried:
-
Lemon zest and pepper – Bright and tangy
-
Chili and lime – Adds heat and freshness
-
Smoked paprika – Tastes almost like BBQ chips
-
Crushed almonds – Pressed into the oil before baking, gives a nutty bite
Try stuff. Keep what works. Trash what doesn’t.
A Little Kitchen Story
I first started making these after a trip to Japan where I ate seaweed snacks every day—on the train, walking around, in little cafés. When I came back home, the store versions just didn’t hit the same. They were flat, lifeless.
I started testing in my tiny apartment kitchen. Burnt a few batches. Made a few that turned out soggy. But eventually found a way that worked. Now, my kids beg for these instead of chips.
And every time I make a batch, it takes me right back to that busy Tokyo street corner, snacking between shops.
Final Tips Before You Get Started
-
Don’t go heavy on the oil. You want crisp, not greasy.
-
Keep an eye on your oven. It’s like making cookies—one minute too long and they’re toast.
-
Make them your own. You’re the boss of your kitchen.
Ready to Try?
So that’s it. Nothing tricky. Just a handful of simple ingredients and a little patience. Keto seaweed snack sheets you actually want to eat, straight from your own oven. No fluff, no fake promises.
If you’ve never tried making your own snacks before, start here. You’ll learn fast, and you’ll feel kind of proud when you hear that satisfying crunch. And hey—now you’ve got something to nibble on that doesn’t mess with your goals.
Next time you walk past those pricey seaweed packs in the store? You’ll just smile, keep walking, and know you’ve got the good stuff waiting at home.
PrintHow to Make Crispy Keto Seaweed Snack Sheets

Crunchy, salty seaweed snacks made right at home with just a few simple ingredients. Perfect for anyone on the keto diet or needing a quick low-carb bite. Cheaper and tastier than store-bought packs. Great for lunchboxes, movie snacks, or just something to munch on between meals.
- Prep Time: 10 minutes
- Cook Time: 10 minutes
- Total Time: 20 minutes
- Yield: About 30 small snack pieces
- Category: Snacks
- Method: Baking or Air Frying
- Cuisine: Asian-inspired, Keto, Low-Carb
Ingredients
-
10 roasted nori seaweed sheets
-
1 tablespoon avocado oil (or olive oil)
-
1–2 drops sesame oil (optional)
-
Pinch of sea salt
-
¼ teaspoon garlic powder (optional)
-
1 teaspoon toasted sesame seeds (optional)
Instructions
-
Preheat oven to 275°F or air fryer to 270°F.
-
In a small bowl, mix avocado oil, sesame oil (if using), salt, and garlic powder.
-
Cut each nori sheet into 6 smaller pieces using scissors or a sharp knife.
-
Brush one piece lightly with the oil mix, then place another sheet on top like a sandwich. Brush the top.
-
Lay the sheets flat on a parchment-lined baking tray or air fryer basket.
-
Bake in oven for 10–12 minutes or air fry for 7–8 minutes. Watch closely so they don’t burn.
-
Let cool to crisp up, then sprinkle sesame seeds if using.
-
Store in an airtight container once fully cooled.
Notes
-
Don’t overdo the oil. A thin layer gives the best crunch.
-
Store with a small pinch of dry rice to help keep them crisp.
-
Great to add flavors like chili flakes, lemon zest, or smoked paprika.
-
Can be made in batches and stored for up to 3 days.